Welcome to The Rock workout & diet plan for getting big fast! Inside you are going to find HD videos of The Rock's favorite exercise with sets & reps given!
The Rock is known for being massive, so today I wanted to share with you some of his workout routines that are staples in his mass building workout.
The goal of this article is to give you a taste of some of his go to routines for every single muscle group so you can try them out and add some new mass building workouts to your routine.
If you enjoyed The Rock Workout plan, make sure to check out The Rock Diet For Getting Huge In A Hurry!
Let’s dive into The Rock’s individual workout plans for getting huge!
The Rock Workout - Chest Day
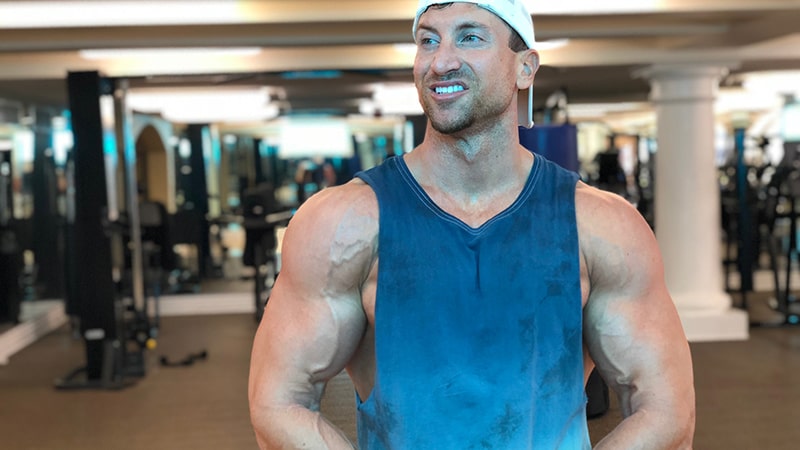
Dwayne The Rock Johnson has an absolute killer chest workout, and if you are a guy struggling to bring up your chest this workout routine will surge you past your genetic potential.
Dwayne The Rock Johnson’s chest workout for mass is a combination of heavy eccentric overload movements, and high repetition training that forces him to channel his “mind-muscle” connection and ignite metabolic stress, which coincides with the 3 Science backed ways your body builds muscle.
This type of workout regimen allows you to get the best of both worlds when building muscle mass and is also a staple in the balloon method workouts that maximize the only 3 ways your body builds muscle.
The Rock’s trainer explained the power of these 2 training regimens in a recent interview.
He said that “Eccentric Overload” training helps you build pure slabs of mass when you combine it with heavy weight training. Eccentric overload training simply means that you are going down on each repetition to a full count of 3 seconds.
The thing that most guys don’t realize is that on the way down you actually create healthier micro-tears than on the repetition where you come up. For example – take the Incline bench press exercise, a staple in The Rock’s workout regimen.
The Rock will go down for a full 3 seconds on each repetition on the incline bench press – and then explode back up. Most guys throw the weight down on their chest as fast as possible using momentum to lift it back up (this is what we call “ego lifting” – but The Rocks a lighter weight he can control throughout the movement and goes down to a full count 3 seconds.
The other portion of Dwayne Johnson’s chest workout involves high repetition “shaper” movements that force him to channel his “mind-muscle” connection. This is a really powerful way to train and he makes sure to keep his repetition range in the 15-20 range for all of these sets with short rest time.
The combination of short rest time + high repetitions allows you to build more nuclei in the muscle cell – which gives the muscle more potential to grow and expand to its full potential. Many guys looking to build mass shy away from these types of exercises and high rep ranges – but if The Rock can pull it off looking like an absolute monster we should try it out as well!
Try this chest routine on your next chest day, and strive to do this workout 4-5 times per month to bring up your chest and develop awesome upper body aesthetics like Dwayne “The Rock” Johnson.
Dwayne “The Rock” Johnson Chest Workout Routine
The first portion of his chest workout involves the combination of heavy lifting + eccentric overload training.
He starts off his chest day with 3 heavy compound lifts and forces himself to add weight to each exercise each workout.
| #1 Incline Barbell Bench Press | |
|---|---|
| Sets | 5 |
| Reps | 4-6 |
| Rest Time | 2 minutes |
| Pace | 3 seconds on the way down, Explosive on the Way Up |
As you should know, free weights are your top priority when the task at hand is creating maximum overload.
For this second overload exercise, we’re utilizing the incline angle and the intensity that a barbell offers.
The incline angle allows for better activation of the clavicular head of the pectoralis major (Upper chest).
Pressing exercises done under this angle must not be neglected, given that we are looking for good overall development.
Note that the optimal upper-chest activation angle forms at 45 degrees or slightly higher.
If you go way higher than that, you’ll activate the shoulders more and it pretty much won’t be a bench press anymore, more so than a shoulder press.
execution
- 1Setup the barbell so that the threads in the middle are right at the center of the backrest of the bench
- 2Lie down and grab the bar wider than shoulder width, with the thumb going over the bar (Very important! Avoid using suicide grip)
- 3Un-rack the barbell and bend elbows slightly, out of lockout to avoid excessive tricep activation
- 4Let the bar go down to the upper portion of your chest, slowly
- 5Without resting the bar on your chests, pause for a split second at the bottom
- 6Push up explosively, contracting the chest up top, with no elbow lockout
Note that you can go really heavy on this exercise, as long as you maintain constant tension and proper exercise execution.
| #2 Decline Barbell Bench Press | |
|---|---|
| Sets | 5 |
| Reps | 4-6 |
| Rest Time | 2 minutes |
| Pace | 3 seconds on the way down, Explosive on the Way Up |
If you've been eyeing your chest with disdain and are looking for exercises to build it up, then we have the perfect one for you. The decline barbell bench press is the perfect lower chest exercise to incorporate into your workout.
If you're wondering what new exercise this is, it is a variation of the bench press which you can do on a flat bench. For this exercise, however, you will be using a decline bench.
The decline barbell bench press is incredible at targeting the chest muscles. It works out muscles in your chest that aren't targeted by other bench press variations, such as the incline bench press and flat bench press.
You'll find that the lower chest muscles are targeted most heavily. Researchers did a study in 1997 published in the Journal of Strength and Conditioning Research that showed that the movement during a decline barbell bench press activates the lower chest muscles significantly. It also helps the upper chest muscles like the incline bench press.
How To Perform The Decline Barbell Bench Press
Execution of the decline barbell bench press needs to be done with proper form. Since the position is different from the regular bench press or any other variation, the wrong technique can do more harm than good. There are 3 stages of performing the exercise.
Stage 1: Preparation

- 1It is important to be warmed up and stretched out before you attempt the decline bench press or any other variation. Apart from your general warm up and stretches, consider a warm up set with just the bar.
- 2Once you're ready, place your legs under the padding of the bench.
- 3Carefully lower yourself into position.
- 4Grip the bar wider than shoulder width, keep your body controlled, and don't arch your back.
Stage 2: Execution

- 1Now that you're in position, it is time to perform the exercise.
- 2Un-rack the barbell and keep it over your chest with elbows slightly bent.
- 3Inhale as you let the barbell go down slowly to the lower chest.
- 4Without letting the bar rest completely at the bottom, push it back up explosively. Exhale as you push the barbell up.
- 5Contract the chest up top, then repeat.
Stage 3: Recovery

- 1Once you've completed the number of sets you had planned, it is time to end.
- 2Put the barbell back and slowly return to a normal position.
- 3If possible, have somebody there to help you rack the barbell after. It isn't easy to re-rack due to the odd positioning.
Tips To Achieve Perfect Form
There is no point in performing a decline barbell bench press if you aren't doing it properly. It'll have no visible effects and can even hurt your progress. Here are some common mistakes that you should keep an eye out for and correct!
Bouncing
The barbell will seem a lot heavier in this variation because of the decline position. A common mistake is to bounce the bar off the chests. It increases the momentum and makes pushing the barbell upwards a lot easier.
Not only can this cause a sternum injury, but it reduces the improvements you would've otherwise seen from doing the decline barbell bench press.
Range of Motion
When looking at the mistakes you're possibly making during the decline barbell bench press, the lack of full range of motion is just as common as bouncing the barbell on the chest. The increased weight and the unique position can hamper your range of motion. Choose a more appropriate weight and use a spotter if you find that you're losing range.
Breathing
The decline barbell bench press isn't all about the weight but also about maintaining your breathing. The right breathing techniques make the exercise more effective and help regulate the pace of the workout as well. Proper breathing keeps you from getting tired fast. So, if you catch yourself not breathing right, take a moment and get your breathing under control.
Spotter
We've mentioned how odd the positioning of the decline bench press is, and the odd position is why you will need a spotter. Re-racking the barbell with the muscle fatigue and awkward angle is hard at best. Having someone around to guide you through the decline barbell bench press is the best way to get through it carefully, without injury.
Benefits of the Decline Barbell Bench Press
The decline barbell bench press has several benefits; both compared to the regular versions and as an exercise itself. A bench press exercise on its own helps strengthen the chest and arms; the decline bench variation works even better. It is usually meant for bodybuilders and those looking to actively bulk up. You won't find athletes gravitating towards this exercise, but heavy lifters will do it religiously.
If you're looking for exercises that will broaden and strengthen your back, lower chest, and arms, then you've found it!
Lower Chest

There lies a stubborn portion of your chest that not many exercises have succeeded in working out. The lower section of the pectoralis major is usually neglected in most exercises. The decline barbell bench press is one of few that work this section. When you perform this exercise properly, you're going to see wonderful results.
Back Stress

If you've ever made the mistake of arching your back during a standard barbell bench press, then you know the pain your lower back experiences. The decline position leaves no room for arching your back or lifting it in any sense. You'll experience no additional stress on your lower back and avoid any injuries in the process when doing the decline barbell bench press.
More Weight

More weight means that your pecs are likely to be worked out better and grow well. The decline barbell bench press allows for greater weights to be lifted because of the angle you're exercising in. The increased weight increases tension and stimulates the growth of the pecs.
Note: When you're increasing the weight being lifted, make sure you have a spotter. The exercise requires unusual positioning and demands that your form and technique is perfect throughout the sets.
In a Workout
Now that we've seen the benefits of the decline barbell bench press, it is important to incorporate it into your own workout routine. It is best done as a part of your chest routine. For best results and muscle growth, you can do all three variations of the bench press.
The incline bench press and flat bench press work your upper body, and the decline barbell bench press works on the lower muscles and lower pecs. All the variations together will chisel out your pecs and work out the triceps and shoulders. The activation of all this muscle group means you'll need to take a break for a day or two.
When performing the decline barbell bench press, you'll need to do more than the regular number of reps. On average, you will be required to do 12 reps in one set. To truly work out the triceps and lower pecs, you'll need to do 3-5 sets. In every way, the decline barbell bench press demands more from you.
Performing this level of strength training, especially if you're new, requires professional instruction and monitoring for a while. Even after you have been performing the decline bench press for a while, you will still require some assistance for your sets to reduce the risk of injury.
Variations
There are several variations of the decline barbell bench press. Some of these variations are simply a change of equipment, others are a variation of the angle at which you perform the bench press.
Decline Dumbbell Bench Press

Generally, the decline bench press is performed with a barbell. Dumbbells are great for balance issues and work as a great alternative for barbells. The dumbbell bench press works brilliantly if you're looking for a freer reach than a barbell can offer. Dumbbells also give you a chance to improve your stabilization and get a good stretch and contraction for your muscles.
Decline Cable Press
Much like the dumbbell, a cable machine is a great tool for keeping constant tension on the muscles without a barbell's restrictive motion. Cable machines are a great part of working out and do wonders in any variation.
To perform a decline bench press with a cable machine, you'll need to set up the decline bench between the cable pulleys. You'll have the same form as the free weight variations, but it is always better to start with a lower amount of weights.
If you're not sure of how to perform a cable press, then you can watch a few video examples to help you get used to the idea.
Flat Bench Press

The decline barbell bench press is a variation of the standard flat bench press. This is a baseline for what the motion will be and what kind of grip, pressure, and weight you can handle.
When it comes to the flat bench press, you're majorly working on the pectoralis major or your pecs. It is necessary to work on these muscles as they are responsible for any pushing movements. The movement allows for a full upper-body workout but requires an exceptional form to prevent injury.
Incline Flat Bench Press

The incline bench press is another variation on the standard bench press. The difference is that you perform the movement on an inclined bench. Most inclines are about 15 to 50 degrees. The greater the incline, the greater the effect on the shoulders and deltoids. The incline helps you work out the upper portion of your body better but doesn't show any drastic differences in your physique.
You'll find yourself having to shift down to lower weights because of the incline. There are differences in the incline that make it impossible to press the same weight that you would in a flat bench press. An incline bench press is great for athletes like football linemen who require more strength in the upper body.
Wrap Up
The decline barbell bench press is an exercise you need to tackle when you're a bit more experienced and have someone to guide you through the process. It is also more effective when you are aware of what kind of strength and physique you are after. While it is great to exercise the whole chest, you might find that you don't like the effect on your body. This bench press exercise, in particular, has some great benefits and will definitely spice up your regular chest workout!
| #3 Dumbbell Bench Press | |
|---|---|
| Sets | 5 |
| Reps | 4-6 |
| Rest Time | 2 minutes |
| Pace | 3 seconds on the way down, Explosive on the Way Up |
It's the most popular exercise at the gym. Yet, it's not as effective as you might think — especially if your goal is to build strength and muscle mass. The traditional bench press is one of the most commonly recommended exercises for chest-building, but its popularity may lie in its ability to boost our ego rather than build our chest muscles.
When people think of chest workouts, a few things come to mind: the barbell bench press, dumbbell flyes, dumbbell decline presses, and cable crossovers. However, there's one exercise that's overlooked by many lifters – particularly those looking to add mass to their pecs.

When it comes to bench press, dumbbells are better than a barbell. Doing dumbbell bench presses allows you to move your arms independently of each other, thus increasing the range of motion and hitting your pecs from different angles. This means you can hit more of your pecs muscles, instead of relying on your stronger side. Dumbbells also work other important muscles, like the triceps — so your arms don't get lopsided and unbalanced.
How To Do A Dumbbell Bench Press
The first step to doing a dumbbell bench press is to load the weights. For light to moderate weight, it's ideal to have a friend hand you the weights once already lay down on the bench. If that's impractical, you can load them from the floor to your knees.

When you lie down on a bench, it's important to squeeze your shoulder blades together. For this reason, it's necessary to keep your feet actively pressed against the ground so that more muscles will be engaged during the lift. With your back acting as the base of this lift, you can tense your back muscles by squeezing your shoulder blades together.
You don't want to launch one too hard and risk hitting your head! Start by holding the dumbbells over your chest, with arms fully extended.
When you think of the back as the base of this exercise, you can really engage your lats. By tensing your scapulas and pulling them together, you're engaging the back muscles and preparing to lift the weight up. This will engage more muscles in your body to help with the lift.

While keeping a slight bend in your elbows, slowly lower the dumbbells in front of your body. Be sure to keep the weights close to the center of your body. At the bottom of the dumbbell press, the weights should be directly below your upper chest.
Your goal is to keep the dumbbells floating in a specific pressing path. Move them in a straight line from your shoulders to your chest. Don't let the weights move out of that path, or you risk damaging your muscles and ligaments. Lower the weights until the ends of the dumbbells are just above your shoulders.
Benefits Of The Dumbbell Bench Press
Though using a barbell might be the more traditional choice, there are several reasons why dumbbells are becoming more popular. Many believe that working out with dumbbells provides a greater range of motion than using a barbell, and this means that you can target your pecs more effectively during the exercise.
The bench press is the king of upper-body exercises for a reason: it builds strength and muscle mass in your chest, shoulders, and arms. Here are just a few benefits to this dumbbell exercise.
More Natural Grip

For people who have previously experienced shoulder injuries, dumbbells might be the ultimate training tool. Unlike a barbell, dumbbells allow your arms to move through a greater range of motion — letting you grab the weights with a more natural grip and letting your elbows flare outward.
You can take your dumbbells with you anywhere and work out when you find the time. The versatility of the dumbbell comes into play here again as you can go fully neutral with your grip (palms facing each other as you grip the dumbbells), and with elbows tucked in to emphasize the triceps, offering an alternative to the close grip standard barbell bench.
Less Risk Of Injury

Safety is always paramount when lifting weights. With a lighter weight, you're free to move around without feeling constrained by a barbell on your back. If you fail a rep without a spotter, getting the weight off of your chest is much easier with dumbbells than it is with a barbell.
For those who want to push themselves to the point of failure, but don't have the option of a spotter, dumbbells are where it is at. Typically you'll be doing less weight with dumbbells because of that increased freedom of movement.
Harder To Cheat

While you will have to lower the weight you're lifting with the dumbbells, you'll find that you are training the muscles more so than you would when using the bench press.
After all, you lose some of the leg drive that is inherent in a good bench, and the back arching that shortens the lift — both of which give you an advantage. Instead, with dumbbells, you are training the muscles and not so much the movement.
Complete Muscle Activation

Most importantly for those who hit the bench purely to get jacked, the muscle activation in the chest (the target muscle) is no different than doing bench with a barbell. The amount of time the target muscles the pectoralis major and anterior deltoid are activated is also not statistically significant between the DB and BB bench, whereas the dumbbell fly lagged, relegating it to a secondary lift.
Enhanced Bicep Training

A study has shown, based on electromyography readings, that the biceps brachii is highly active when dumbbells are used during bench press exercises. The reason for this could include the instability of the exercise- a key factor in muscle recruitment.
Each exercise required more stability than the last, leading to increased muscle activation in the biceps brachii and other muscles.
Better Range Of Motion Than The Barbell Bench Press

Barbells are great, but dumbbells do certain things better, including taking your muscles farther through a longer range of motion. This extra damage not only results in more growth, but it also makes the exercise more joint-friendly.
The flat bench press is a classic lift, but because there is no barbell anchored to your chest, you have more range of motion than you would with a barbell. This means that your chest gets more stretch, which means more muscle damage and thus bigger gains.
Improved Stability
The dumbbell bench press is just as effective as the barbell version because each arm can be worked independently, much like a single leg squat. The built-in instability of the dumbbell bench press challenges your muscles to fire more rapidly, strengthening joint stability and overall balance in the process.
Greater Strength
Performance athletes choose weight lifting over bodybuilding because they want to develop strength rather than size. For strength building, athletes should use heavier weights for lower reps. Tempos and ranges of motion can remain similar to hypertrophy training, although some positions might benefit from slow rep speeds and slower ranges of motion. To start, try three to five sets of five to eight reps using a very heavy load. Rest 90 seconds between sets.
More Endurance
Lifters who want to build muscle endurance should aim for between 20 and 30 repetitions in a set, with 2 to 3 minutes of rest between each set. This is a great way to build muscular endurance for sports that involve short bursts of force with little time for recovery, like football or basketball.
Muscles Worked By The Dumbbell Bench Press
The dumbbell bench press is an extremely effective movement for increasing upper body strength and muscle mass for both aesthetics and performance. Below are the key muscles stressed during the dumbbell bench press.
Pecs
The chest is the primary muscle group activated during the dumbbell bench press. With dumbbells, many lifters find that they can engage in a greater range of motion during the eccentric aspect of the lift. This lengthens and stretches the muscles in a way that isn't present during a barbell bench press.
Triceps
In the bench press, the triceps are critical for two things. The first is to stabilize the elbows during the initial descent of the dumbbells. Without stable elbows, there would be no way to press the dumbbells up. The second function of the triceps is to extend the elbows in a lockout at the top of the bench press movement.
Shoulders
The shoulders, or deltoids, have three separate muscles — the anterior (front), middle, and posterior (back). However, the primary movers are the anterior deltoid and the medial deltoid, which function to adduct (bring towards midline) and abduct (move away from the midline) the humerus (upper arm), and are most active during pressing movements like the bench press.
Want to know how much The Rock can bench press so you can challenge yourself to lift as much as the box office champ? Dwayne can bench press about 450 lbs. and does 315 lbs. on his sets of incline bench press eccentric training!
The 2nd portion of his chest workout is all about high repetition + short rest time training known as “nuclei overload” training. Nuclei Overload training is one of the most powerful forms of training because increases the amount of nucleus in the muscle cell is the fastest track to surging through your genetic potential.
Here are the 3 Exercises he does on Chest day! (Do these after eccentric overload training)
| #1 Dumbbell Pullover | |
|---|---|
| Sets | 4 |
| Reps | 15-20 |
| Rest Time | 45 seconds |
When you're trying to build your chest and back, you need to focus on heavy compound lifts that will stimulate the greatest overall growth.
At the same time, you can't spend all your time focusing on one muscle group.
Throwing in some accessory work for lagging muscle groups can help you balance out your physique without sacrificing your primary goal.
The dumbbell pullover exercise is a powerhouse for your upper body. It allows you to work the back and chest, hitting them at slightly different angles than most other exercises do.
Whether you're trying to build a little more width in your pecs, or a little more thickness in your lats, you need the dumbbell pullover exercise in your workout routine.
How To Perform The Dumbbell Pullover

To do a dumbbell pullover, lie down on a bench that's about waist height with your head and upper body supported and your feet planted on the floor.
Be extra careful because the dumbbell is positioned directly above your face, so start slowly and use light weights.
Hold the dumbbell with both hands above your chest with your arms extended. With your palms facing the dumbbell, use your thumbs and fingers to grab the far end of the dumbbell.

With your core engaged and chest out, lower the dumbbell behind your head until your elbows reach a 90-degree angle. Keep a slight bend in your elbows and do not arch your back. Lower the weight until it is about level with your head, then slowly bring it back up to the starting position.
While doing the dumbbell pullover, do not move your elbows. Keep a tight core, straight wrists, and breathe out as you bring the dumbbells in line with your chest.
Begin doing the dumbbell pullover with a single dumbbell and do two to three sets of six to eight repetitions. Mix the pullover into your existing workout, or do it as a standalone exercise.
Safety Tips For Dumbbell Pullovers

If you can't perform pullovers without bouncing or using momentum, it's an indication that you don't have the necessary shoulder mobility. Likewise, if a pull-up feels like a struggle for you, you need to improve your shoulder mobility to make it easier on your joints.
If you can do a set of each of the following exercises with a complete range of motion, then you should be able to perform the dumbbell pullover with ease: arm circle, sidearm raise, and overhead press. If you can't, then you might want to look at some shoulder mobility routines online and try again in a month or so.
Variations Of The Dumbbell Pullover
If you don't have a flat bench available to do the dumbbell pullover, you can still perform this exercise.
Changing Up Your Equipment

Lie flat on the floor. As you do so, you'll need to move the dumbbell over your head until it touches the floor. Pause for a second, then lower. Be sure to pause with the dumbbell above the floor so you're holding the entire weight in the air.
Using a different piece of equipment can mean heavier lifts and different grip angles. Use an overhand grip when using a barbell. This might limit your range of motion so be sure to have a spotter, just in case you're lifting heavy.
Lat activation exercises, such as standing and using the cable machine with the cable set high, can be useful for developing the upper-back muscles. The lying decline pullover is also a good chest exercise that works the triceps muscles and deltoids because you are lying on a decline bench.
Making The Dumbbell Pullover Easier

To make the dumbbell pullover easier, choose a lighter weight. Whether it is your first time trying this exercise or the last, always select a weight that allows you to perform all reps with proper form. To regress the pullover, bend your elbows slightly. This will bring the weight slightly closer to your body, decreasing the amount of work placed on your core and lower back when the dumbbell is in its lowest position.
Making The Dumbbell Pullover Harder
To increase the difficulty of the dumbbell pullover, choose a heavier weight. This simple change will increase the load on your chest and back muscles, making each movement more challenging. Hoisting your legs a few inches above the bench will give your core a bit of a workout, too.
In lieu of a bulky weight bench, use an exercise ball instead. Keeping the head and neck supported on the ball, engage the abdominal and gluteal muscles to keep the hips stable and elevated. If there's any movement at all in the hips, this becomes a total body exercise with the lower body supporting and stabilizing and the upper body moving.
You can combine a dumbbell overhead press with a lower leg extension to create a new type of exercise. In this version, you'll start out in the basic position. Then, keeping the knees bent, lift the feet off the floor so that the knees are positioned over the hips. You'll be in a dead bug position with straight legs. Perform one repetition of the dumbbell pullover and finish with the arms straight as you hold in a tabletop position.
Proper Form Tips For Dumbbell Pullovers

The decline of the classic bench press as the go-to upper body strength exercise probably has something to do with the fact that so few people can do it properly—or without substantial risk of injury.
When performing the dumbbell pullover, make sure to keep your low back pressed against the bench at all times. This will ensure a deep engagement of the core muscles, especially the transverse abdominis and latissimus dorsi.
If you're arching your back up off of the bench during a dumbbell pullover, you're likely not engaging your core fully. This is likely because the weight is too heavy for you, or due to a lack of practice with this move.
If this is the case, you should reduce the weight or try to engage your core more. This will help you stabilize your core and keep it from arching up off of the bench.
Biggest Mistakes You Might Make Doing Dumbbell Pullovers
The dumbbell pullover is a simple exercise, but it's easy to mess up — even experienced athletes can drop the ball.
Most of these mistakes stem from form issues and can be remedied by making subtle improvements to your posture.
Poor Starting Position
Let's say that you're trying to get a toned body, and you have a small weight bench in your basement. You know that by sitting in the middle of the bench, your head and neck will be supported without any issues.
However, if you support the upper body on the bench, while leaving the hips unsupported, you may experience lower back pain in the days following your workout.
Weak Or Disengaged Core
Ensure that your core is well-conditioned before performing any rowing variation. This will help you maintain a strong, neutral spine throughout the exercise.
During the extension phase of the pullover (arms fully extended), you may start to arch through your lower back and abdominal area.
This is especially likely to happen if you have limited mobility through your chest and shoulder area.
To perfect the dumbbell pullover, lower back and abdominal strength is key. The lowering phase of the exercise can put a lot of strain on your back; it's important to maintain good posture and engage your lower abs during this time.
Too Much Wrist Action
You should keep your palms facing each other throughout the full range of movement. This will help you maintain strong wrists. However, the weight might be too heavy if your wrists flop — in that case, you should decrease the amount of weight you're using so that you can keep your elbows as close together as possible.
Uneven Motion
If one side of your body is stronger than the other or has a greater range of flexibility, you may notice that one arm extends further or faster than the other.
Try to move both arms at the same time, keeping the motion even all the way throughout. You don't want the extension on one side to be larger than the other or you'll exacerbate the problem and develop your muscles unevenly.
Muscle Groups Worked By The Dumbbell Pullover
The dumbbell pullover is an upper body exercise concentrating primarily on your lats and pecs. The lats — spanning the length of your back, attaching to your upper arms, and originating in your mid-back and lower back — are a fan-shaped muscle highly involved in pulling and rowing motions. They're assisted by your trapezius and rhomboid muscles, which allow you to move easily.
Front-side chest exercises, such as pullovers, target the pectoralis major and minor. The pectoralis major has two heads, which merge together to form a tendon that attaches to your upper arm bone. The pectoralis minor is situated just below the pectoralis major and attaches to your upper ribs and the front side of your chest.
Apart from the anterior deltoid and triceps brachii, the rhomboids, posterior deltoid, pectoralis minor, and long head of triceps also perform as synergists. The clavicular head of the pectoralis major and triceps brachii act as stabilizers.
Benefits Of The Dumbbell Pullover
The dumbbell pullover offers a few key benefits that include superior shoulder width, improved chest development, and an extremely high strength-to-weight ratio. If you are among the best candidates for this movement (i.e. some people shouldn't do this exercise), then you check out what the dumbbell pullover can do for you:
Increases Upper-Body Strength
Although considered to be a chest exercise, the dumbbell pullover also effectively works the triceps and lats. So get ready for bigger arms and back muscles. However, contrary to popular belief, it does not work the serratus anterior—the rib muscles.
Dumbbell pullovers are no good for expanding the rib cage. In fact, no exercise ever has been found to expand the rib cage.
However, they do increase muscle mass in all of the areas surrounding the ribs. So, even though they may not expand the rib cage per se, they do have a positive effect on its appearance if used regularly.
More Stability
The dumbbell pullover is a fantastic exercise that can be performed at the end of your chest workout. It will work on your pectoral muscles, but it'll also test many stabilizer muscles throughout your body; specifically those in the upper back/scapular region, the gluteal muscles, and the abdominal area.
Improved Range Of Motion
The dumbbell pullover is one of the best exercises for maintaining and improving flexibility in your chest and shoulder region. The amount of stretching involved in performing this exercise effectively improves your range of motion, which means that you'll be able to move better in all of the things that you do every day.
More Complete Full-Body Workout
You can do some heavy flyes, but it's not a very good idea. In fact, I'd go so far as to say that it's a bad idea. With dumbbell pullovers, however, you get a great stretch in your back and pecs without risking injury.
Flyes are great for targeting the pec muscles, but they're not ideal for really building size. In order to get bigger pecs, it's important to overload them with heavy weight and a full range of motion — which is exactly what the dumbbell pullover does! You don't have to go heavy with this exercise, but it allows you to overload the stretch on your chest so that you give your chest muscles the stimuli they need for growth.
More Efficient Muscle Growth
Few people know this, but one of the best exercises for the lats is actually a great dumbbell pullover exercise for other upper body muscle groups. By doing rows before more complex compound lifts, you'll be able to work your lats directly without other muscles taking away from your sets. This way, you can give the lats their focused attention and truly build them up!
The dumbbell pullover can be modified to hit the muscles in different ways. Using a lighter weight will still work the core. Holding the dumbbell behind the neck will work the shoulders and back. The bar can also be held above the chest if you want to get more out of your deltoid muscles.
Adding volume to your pecs in an unnatural way can stimulate muscle growth. The lat pullover is the only way to isolate your lats, taking out the assistance work of other back muscles and even your biceps. This kind of isolation is the perfect pre-exhaustion exercise for targeting your lats.
| #2 Low to High Cable Flys | |
|---|---|
| Sets | 4 |
| Reps | 15-20 |
| Rest Time | 45 seconds |
This exercise reverses the position you’re using with the cables and now rather than pushing down, you’re pulling up.
As you might imagine, that is going to change the nature of the stress being placed on the chest, putting more emphasis on the upper chest instead of the lower.
execution
- 1Stand in the middle of the cable machine
- 2Grab both lower pulleys and keep them to the sides of the hips
- 3Lift the handles up and contract the chest up top
- 4Go back down and repeat, alternating between arms – Left over right, right over left
| #3 Incline Cable Fly | |
|---|---|
| Sets | 3 |
| Reps | 20-25 (Complete Burn Out) |
| Rest Time | 30 seconds |
The great thing about using cables when doing your chest exercises is that you can keep greater muscle tension on that chest throughout the entire movement, thus eliciting better overall gains.
By using an incline bench, you’ll be adjust the angle in which the chest is being worked and help ensure maximum stress is placed on that inner chest muscle.
execution
- 1Place a bench in the middle of a double-sided cable machine
- 2Adjust the bench to an incline, 45-degree angle
- 3Grab both handles and lie down on the bench comfortably
- 4Keep the arms above the chest with elbows slightly bent
- 5Puff up the chest slightly, then open up the arms and stretch the pectoral muscles
- 6Explode on the way up, closing the arms and contracting the chest
Focus on squeezing the cables together as you perform this movement and avoid taking the arms too far down on the decent or you’ll lose the tension being placed on the chest muscle.
Avoid going too heavy on this one or you’ll be calling your biceps and shoulders into play.
We just want the focus to be on the chest muscle only.
Aim for 15 reps per set.
This is the complete Dwayne Johnson chest workout routine for mass! Not only will this routine get you much stronger, but it will help you sculpt every section of your chest for a massive upper body like The Rock!
Dwayne The Rock Johnson Arm Workout for Massive Pythons!

You have to eat big to get big. The workouts are great but you need to be in a calorie surplus to get big fast!
Dwayne The Rock Johnson has one helluva arm workout, and it's no surprise he has massive 20 inch arms.
This arm workout is so intense that we only recommend you do it 1-2x per week so you can allow your body to get optimal rest. Believe it or not The Rock hasn’t always had massive arms, and he considers it one of his weak points.
In the next section we are going to give you the exact Arm workout routine that he does, as he trains biceps and triceps on the same day.
If your arms are your genetic weak point you should make a point to train them by themselves just like this, smashing biceps and triceps back to back.
Ready to dive into his insane arm workout routine? Let’s dive right in!
Dwayne The Rock Johnson Arm Workout Routine (Biceps + Triceps)
Here is the “Suns Out, Guns Out” arm day workout you have been waiting for!
Dwayne Johnson’s arm day was all about creating maximum tension and keeping the rest times really short. His arm workout routine would consist of 30-45 second rest periods and sets in the 8-12 repetition range.
He would also superset a variety of bicep and triceps exercises since they are opposing muscle groups.
If you are struggling to bring up your arms try doing more biceps and triceps supersets to shock the arms into growth and give your body a different type of overload.
| #1 Barbell Curl | |
|---|---|
| Sets | 3 |
| Reps | 8-12 |
| Rest Time | 45 seconds |
Biceps - big, bulky, defined biceps are anyone's goal in the gym. There is no doubt about that. The barbell curl is perhaps the most underrated bicep exercise on the block. If done correctly, it can craft significant bicep gains. Here is the low down on bicep curls with a barbell.
How to Perform the Barbell Curls for Bigger Biceps
- 1Standing in front of a barbell, grip it slightly wider than shoulder-width apart, with an underhand grip. Your palms should be facing upwards.
- 2Stand with your back straight and your feet hip-width apart. Look forward.
- 3Begin curling your arm upwards. Keep your elbows tucked in and stationary.
- 4Your body should be completely still, only your arms should hinge at the elbows. Don't bring the bar up to your shoulders. It should reach the mid-chest level.
- 5Squeeze at the top of the curl. Slowly begin lowering back to the starting position.
- 6You should control the weight on the downward return and engage all the muscles in the arms.
- 7Repeat for 3 sets of 10 - 12 reps.
TIP: Your body shouldn't swing to get the barbell up with motion. It should remain stationary; the work comes in from your biceps.
Primary Muscles Targeted & Secondary Areas
Biceps are actually two muscles; they consist of the long head and the short head. The biceps run from the elbow to the shoulders. Without a muscular bicep, the effects of aging will cause a determination in the range of movement across your entire arm. The biceps are strong and in charge of controlling elbow flexion and supination of the forearm.
The secondary target of any bicep curl, barbell or dumbbell, is the forearm. Barbell curls grow your forearms and improve your grip strength.

Reps & Weights
As with everything, there are recommendations and suggestions. These are there to ensure that your training is risk and injury-free. Going too hard on your weights might not give you physical harm the first time, but it is enough to give you T-Rex arms the next day. Sore, cramped up, and definitely NOT the look you want.
Beginner
Beginners should go for:
Intermediate
Intermediate lifters can go for:
Advanced
Advanced level fitness fundis should aim for upwards of:
Listen to your body and perfect the movement before progressing onto heavier weight sets. That is how you guarantee a perfectly built bicep. You might also want to check out our one-rep max calculator to find the right load for you.
Barbell Curl Benefits
As far as the barbell curl goes, this exercise has several benefits. Exercises aren't just superficially great; it is a little deeper than that.

Tips FOR DOING THE BARBELL CURL

Adding Barbell Curls to Your Routine
How do you add these bad boys to your routine? It's simple, slot them in the right at the start of arms or chest day. Here are a few other exercises you can do alongside the curl.
Dumbbell flyes
The dumbbell fly is excellent for pecs and traps.

- 1Lying with your head and shoulders flat on a bench at a 45-degree incline, plant your feet flat on the floor.
- 2Hold a set of dumbbells, one in each hand directly above your chest; your palms should be facing each other. Begin to form an arc as you lower the weights to your sides.
- 3Engage the pectoral muscles to reverse the movement.
- 4Keep your elbows slightly bent throughout and your back flat.
Bench press
You can't just work on your biceps alone; it will distort your arms' aesthetic if your traps, pecs, and delts are not defined and built as well. Bench presses are the perfect addition to an arm day workout involving the biceps.
Here's how to bench perfectly:

- 1Lying flat on a bench, grip the bar - your hands should be slightly wider than shoulder-width apart.
- 2Slowly bring the bar down to your chest while you inhale.
- 3Begin pushing the bar up as you exhale, grip the bar hard and focus on a spot on the ceiling.
- 4Once at the top, squeeze for a full count of one.
- 5Slowly return to the starting position.
Reverse barbell curl
Reverse barbell curls are vital for growing the brachialis muscle underneath the biceps, which is often neglected.

- 1Gripping a bar with a shoulder-width grip, your hands should be pronated. Gripping the top of the bar, it is the opposite grip of the traditional curl.
- 2Keep your elbows close to your sides and a slight bend in your knee. Grip the bar tightly.
- 3Begin to curl it up as you would with a regular curl. The pronated grip will engage the brachialis muscles.
- 4You should feel the tension in your forearms as you come toward the top.
- 5Hold the curl for a second or two at the top, and begin to lower back down to the starting position.
- 6Repeat. Try not to go too hard here as the muscles will be sore the next day.
Concentration curl
Anyone that lifts and enjoys lifting will be able to tell you that the concentration curl is an excellent way to build bigger biceps. Try the close-grip concentration barbell curl - it’s great for working on isolating your biceps.

- 1To do these perfectly, sit on the edge of a seat and position your feet around 24 inches apart.
- 2Grip either a free weight or an EZ-bar with an underhand grasp and with around 6-inches of space between your hands.
- 3Twist forward at the midriff and support your elbows on your internal thighs around 4 inches from your knees.
- 4Focus on your biceps, lifting the bar until your lower arms touch your biceps.
- 5Contract your biceps completely. Begin to lower your arms down to the starting position slowly.
- 6Try to keep your body and upper-arms still while you're performing these curls.
Who does the curl?
The barbell curl is no stranger in the midst of heavy-weight legends. Here are a few famous lifters who love the curl, and they have the biceps to back it up.

Barbell Curl Variations & Alternatives
If you are looking for a few alternatives or a few variations to try out, look no further. These alternatives are bicep killers!
Incline dumbbell curls

- 1To do the include dumbbell curls, sit down on a bench set to 45-degrees. Flatten your back against the bench. Engage your abdominal muscles tight.
- 2Hold a dumbbell in each hand. Begin lifting each dumbbell toward your shoulders.
- 3Slowly lower the dumbbells back down to the starting position.
Zottman curl
Zottman curls target one of the biggest muscles in the arms: brachioradialis. Here is how to get that big muscle strong and visible.

- 1Keep your back straight & grip a set of dumbbells. Begin contracting your biceps and curl the weights up towards the shoulders. Keep your elbows tucked in and tight.
- 2Squeeze your biceps hard at the top of the curl.
- 3Begin twisting your hands so that your palms face the ground.
- 4Slowly lower the dumbbells to the starting position.
- 5Turn your palms upwards to the starting position.
EZ-bar curl
EZ-bar curls are wrist savers - some lifters might find barbell curls to be uncomfortable on the wrists. They are almost exactly like regular curls except for the bar used - the EZ-bar has a set of bends in it that enable your palms to face each other. This takes a little strain off the wrist area and helps you benefit from barbell curls without strain.

- 1In order for you to perform the EZ-bar curls, grab the outermost bends in the bar with an underhand grip. You should tilt your palms toward one another.
- 2The same rules apply to the EZ-bar curl. Curl the bar up towards the upper body.
- 3Stand up straight with your head up and keep your elbows stationary. There should be no motion in your elbows.
- 4As you lift the bar upwards toward your chest, your forearms should touch your biceps - lower the bar to the starting position and repeat.
Chin-ups

- 1To perform a chin-up, station a bench or jump box underneath the pull-up bar, step up to the top of the platform.
- 2Reach up and grip the bar with two hands in a palms-up grasp. Keep your back elongated and your spine straight, lift your chest and engage your abs to help stabilize your trunk.
- 3Begin pulling the body up to the bar. Try lifting your chest to the bar by pulling the elbows past the rib cage.
- 4At the top, pause and hold. Begin to control the descent as you release and lower your body down to the starting position.
- 5Don't just drop down - releasing gradually holds the muscles under pressure for longer, creating strength and definition.
The Bigger, The Better

Bigger, better arms are not just good to look at; they have a function and a purpose. They make your life easier doing everyday functions and picking up heavy items or moving houses.
There are few people who tell you they don't want to age well in this life. Those people are lying. Muscular and functional biceps are a lifelong advantage. Later in life and in present times, you will see the benefits and feel them instantly.
| #2 Overhead Tricep Press | |
|---|---|
| Sets | 3 |
| Reps | 8-12 |
| Rest Time | 45 seconds |
If you're trying to build a better upper body, ditch the bicep curls and focus on your triceps. Sure, not only do they make up two-thirds of your upper arm mass, but they're also critical to overall strength and power. The overhead tricep press, also known as the overhead triceps extension, helps you do exactly that.
Since two-thirds of your upper arm size comes from this muscle, it's important to isolate it during training. The best movements for getting bigger, stronger triceps are dips and the overhead tricep press.
If you want to build barrel-shaped triceps — the kind that stand out when you wear a tank top or sleeveless shirt — one of your best bets is the overhead tricep press. It's a great move for buffing the backs of your arms. What's more, the overhead tricep press will help you nail your bench press form for increased gains in the chest and shoulder muscles.
How To Perform The Overhead Tricep Press

Sit on a box or bench with your feet shoulder-width apart and core tight. Hold a dumbbell in both hands, arms extended forward with palms facing up. This is the start position.
Slowly lower the dumbbell behind your head, bending at the elbows and squeezing your triceps to get it as low as you can. The goal is to get the dumbbell as close to touching or grazing the back of your head without hitting it.
Aim for 5 sets of 8-12 repetitions.
Form Tips For The Overhead Tricep Press

Keep your back straight. By sitting on top of a short box, you can place your upper back against the wall, which will allow you to sit upright without rounding your upper back. For even more support, try sitting criss-cross, which will force you to sit upright and keep your back straight.
If you have bad posture, it can lead to tension and pain in your shoulders and arms. This is because many of the muscles in your shoulders and arms are connected to your spine, so poor posture can cause pain or tension in these muscles.
The overhead press is a compound exercise that also works the triceps. It’s a great exercise to strengthen your shoulders and back, but it’s important to be careful when doing them back-to-back with seated rows (which also work the triceps).
I love when I can teach something that is both easy and effective. Lateral arm lifts are great for toning your arms and improving the appearance of your triceps. To get the most out of this exercise, you need to hold the position for a beat when your arms are fully extended.
The overhead tricep press is a great exercise for working your triceps and giving you a nice shape to your arms. The only problem is that it can put a lot of stress on your wrists, which can lead to injury. One way to avoid this is to keep your wrists straight and not bend them to the side.
Muscle Groups Worked By The Overhead Tricep Press
This exercise hits all the major muscle groups of the body — shoulders, back, core, and upper arms — making it an interesting addition to your weekly workout routine. Standing with the dumbbell above your head during each repetition, you will strengthen your upper body and core muscles.

The triceps press primarily engages the triceps muscle, one of the three muscles that make up the upper arm. However, there are many other smaller muscles that also work to stabilize the movement and give the arm more strength during the overhead triceps extension.
The primary function of this muscle is elbow extension, but it also assists in shoulder stabilization and adduction (bringing the arm down).
The overhead triceps press is the best exercise for targeting the long head of the triceps. It works all three heads of the muscle, but this exercise, in particular, focuses on the long head.
Although your triceps receive most of the tension during the exercise motion, your shoulders play a secondary role as well as they contract and shorten at the top of each rep.
Benefits Of The Overhead Tricep Press
The overhead triceps extension is multifaceted, strengthening all three heads of your triceps, as well as engaging your core and shoulder muscles to maintain stability. It's ideal for correcting imbalances and forcing each arm to work independently — with no leg assistance — for optimal results.
More Rapid Triceps Growth
There's no denying which muscle experiences the most growth during an overhead tricep press. In fact, the long, medial, and lateral heads — respectively — are responsible for its development. But how they do so differs slightly depending on a number of factors, including your grip, body position, and the plane of movement.

The triceps muscle is made up of three heads: a long, lateral, and medial head. The long head starts on the scapula (shoulder blade) and attaches at the elbow to facilitate elbow extension. The lateral head originates at the humerus (upper arm), and the medial head also starts at the humerus, attaching just below where the lateral head begins. These three muscles collectively form a horseshoe shape.
Better Deltoids

There are three sections to the deltoid muscle: the anterior (front) deltoid, which helps raise your arm forward; the lateral deltoid, which helps raise your arm out to the side; and the posterior (rear) deltoid, which helps raise your arm behind you. In an overhead tricep press, the anterior delt receives the majority of work while the lateral and posterior delts help stabilize.
Superior Strength Gains

The overhead tricep press is a single-joint movement that allows you to target the triceps through a full range of motion. By lifting the weight above your head, you can stimulate the entire triceps, including all three heads — the lateral (outer), long (inner), and medial (middle) heads.
Whether you want to build mass in your arms or just improve your upper body strength, you'll benefit from incorporating this simple exercise into your routine.
More Mobility In The Arms

The overhead tricep press is superior to other triceps exercises because of its ability to activate all three heads of the muscle. By working all parts of the triceps, this exercise leads to better-looking arms and improved performance in sports like tennis, golf, or baseball. This is because when you're swinging a tennis racquet or throwing a baseball, your entire arm is engaged — including the triceps!
Better Posture

The overhead tricep press is the perfect exercise to learn about proper posture. Engaging your core muscles during this workout ensures that your back and spine remain straight, while engaged shoulders help you lift your shoulders instead of hunching forward.
Even when you're seated, you can benefit from performing the overhead tricep press. With a bit of practice, you'll notice an improvement in your posture.
Low-Impact Workout
Don't sacrifice form for comfort. During the overhead tricep press, your wrists maintain a neutral position, and you can focus on proper form and alignment. If you suffer from wrist pain or discomfort, the overhead tricep press is ideal for you.
| #3 Overhead Rope Tricep Extension | |
|---|---|
| Sets | 3 |
| Reps | 10-15 |
| Rest Time | 45 seconds |
The overhead rope tricep extension is a great tricep move to build mass on your arms. This tricep exercise favors the long head of the triceps, which helps your arms look wider from the back and bigger overall.
This tricep exercise requires a cable machine. Watch the video above carefully for exact form!
execution
- 1Set the cable at the highest or near highest position
- 2Grab the rope and take a step out
- 3Stagger your feet so one foot is in front of the other
- 4Keep your elbows in as you bring the rope overhead
- 5Press directly out in front of you turning the wrist out as you extend out
- 6Come back slow and controlled each rep
- 7Aim for 8-12 reps per set with short rest times
| #4 Weighted Dips | |
|---|---|
| Sets | 3 |
| Reps | 8-12 on each portion of the superset |
| Rest Time | 45 seconds |
If you want activation in your lower chest, this exercise is top rated.
Skip it at your own risk. Chances are you’ve done these before so you don’t need me to tell you much about them.
All I can say is get them in. I like starting all my chest workouts with weighted dips as a primer for what’s to come and to ensure that I’m never skipping over them because I’m just too tired to get it done.
execution
- 1Wrap a weighted belt around your waist
- 2Get up on the parallel bar
- 3Bend elbows slightly to drive the tension through the chest, shoulders and triceps
- 4Dip down slowly, stretching the chest
- 5Push back up explosively, contracting the chest
Note that you should avoid locking out the elbows at the top.
I recommend doing 3 sets total of 8-12 reps for weighted dips.
You’ll want to go heavy enough on this exercise that you do feel the muscles working hard, but not so heavy that you begin to let the triceps start taking over.
This is a common mistake that is made far too often by many guys.
While you always will get some tricep activation, remember this is a chest exercise not a tricep one.
| #5 Supinated Bicep Curls | |
|---|---|
| Sets | 3 |
| Reps | 10-12 each set |
| Rest Time | 20 seconds |
Note that we are focusing on a prominent supination to allow for maximum long head activation at the peak flexion of the movement.
To further optimize the movement, we lock the elbows to the sides and avoid inertial movements to help us on the way up.
Remember – The more tension and activation to the biceps, the better.
execution
- 1Grab a pair of dumbbells and keep them by your sides
- 2Start in a supinated position and keep torso straight and stable
- 3Curl one of the dumbbells up, further supinating the wrist and contracting the biceps prominently
- 4Go down slowly on the eccentric phase and contract the triceps at the bottom while stretching the biceps
- 5Repeat the same thing on the opposite side
Note: You must not use inertial movements, nor should your elbow move forward. Go for maximum tension on the biceps.
| #6 Dumbbell Hammer Curl | |
|---|---|
| Sets | 3 |
| Reps | 6-8 |
| Rest Time | 1 minute |
The dumbbell hammer curl is an awesome bicep exercise that puts emphasis on both the biceps brachii and the brachialis. This version of the curl works the forearms more than the regular curl which makes it an excellent overall upper arm developer.
Dumbbell Hammer Curl Execution
- 1Hold a dumbbell in each hand
- 2Keep the dumbbells by your sides with the palms facing the torso
- 3Hammer the left dumbbell up without rotating the wrist
- 4Contract the upper arm up top
- 5Go back down slowly
- 6Repeat on the opposite side
- 7Alternate between sides
Tips to Get More Out of Dumbbell Hammer Curl

Common Dumbbell Hammer Curl Mistakes
Momentum

The tendency to swing the back when curling is common to all types of curls. When you use momentum in this way you negate the benefits of the exercise to the biceps. Not only does it take the tension off the target muscle, but it also puts your lower back at risk of injury due to the excessive swing involved.
The main reason that people use momentum when doing the dumbbell hammer curl is that they are using too much weight. To eliminate this tendency, start developing the mind-muscle connection by focusing more on the feel in the target muscle than the weight on the bar.
Speed

Most people do their curling work too fast. For maximum hypertrophy potential, each set that you perform should last about 45 seconds. If you are doing 10 reps, that means that you should be spending about 4.5 seconds on each rep. That is about twice as long as most people currently use to perform a rep.
In order to increase your overall time under tension, you should adjust your rep cadence. I recommend using the following cadence: 2-1-2.5.
That means that you should take 2 seconds to lift the weight, 1 second to hold the top contracted position, and 2.5 seconds to lower the weight.
A reason that some people may be using too much speed is that they are not using enough weight. if you feel that may be the case for you, add 2.5 pounds and try doing 8 reps using the cadence that I've recommended. If you can perform your set following the cadence scheme and with good form, stick with that weight until you are ready to push beyond it (which will be when you are able to do 12 reps at the weight you are currently performing for 8 reps).
Elbow Displacement

When you allow the elbows to move away from your side, you start to bring the front deltoids into the curling movement. It is easy for the front delts to dominate at the expense of the biceps. Focus on only moving up and down with your forearms while doing this exercise. If you are unable to do this, it is a sure sign that the dumbbells in your hands are too heavy. Put them back on the rack and grab a lighter pair.
Dumbbell Hammer Curl Variations
Seated Hammer Curl

Seated hammer curls is a stricter version of the movement because it takes the momentum out of the exercise. To perform this exercise, sit on a bench with a 90 degree back support. Sit with a pair of dumbbells in your hands and your palms in a neutral position (facing the thighs).
Be sure to keep your back against the bench as you curl up with your forearms. Hold the contracted position and then lower to the start position under control.
Rope Hammer Cable Curl
Stand in front of a single cable pulley machine and place the pulley at the lowest setting. Put a rope handle on the end of the cable and grab it with a neutral grip (palms facing each other). Curl the handles up to full contraction, hold for a second, and then lower to the start position.

There are many benefits to using a cable pulley machine for the hammer curl. When you do the hammer curl with dumbbells the resistance is acting straight down as a result of the force of gravity. However, that is not in harmony with the natural strength curve of the biceps. When you are using a cable, however, the direction of resistance is no longer straight up and down but on an angle that is close to perpendicular to the operating lever (which is the forearm). That is much closer to the ideal range of motion of the biceps.
Using a cable also more closely mirrors the ideal resistance curve of the biceps. All muscles, including the biceps, are strongest during the first third of their range of motion. They then diminish their strength as the range of motion progresses. When you do the hammer curl with dumbbells, however, you get the opposite effect - the exercise is easier at the beginning and harder at the end. The cable curl is the only version of the curl that reverses this so that it ideally replicates the biceps' natural strength curve - it is harder during the first third of the curl, then gets easier as you progress toward the completion of the curl.
The cable curl also keeps tension on the biceps throughout your full range of motion when doing the hammer curl. You should cut out the final 10 percent of the rep in order to keep the tension on the biceps.
Supinated Hammer Curl

Supinated hammer curls are the same as the standard dumbbell hammer curl except that, at the top of the movement, you supinate the wrist to turn the palms upward. In the top position, the movement will look like the standard dumbbell curl. This action will initiate an extra action in the bicep, helping to provide a greater peak contraction.
Dumbbell Hammer Curl Alternatives
Incline Seated Dumbbell Curl
- 1To do an incline dumbbell curl, lie on an incline bench, with your back pressed firmly against the padding and your feet flat on the floor. The bench should be set at around a 45 degree angle.
- 2Hang your arms at your sides, holding the dumbbells with an underhand grip (palms facing forward).
- 3Slowly curl the right dumbbell toward your right shoulder.
- 4When maximum bicep contraction occurs, slowly lower the dumbbell to the start position and repeat the movement with the left arm.
- 5Continue alternating right and left arms until the desired number of repetitions is completed.
Standing Dumbbell Curl

- 1For the standing dumbbell curl, grasp the dumbbells using an underhand grip (palms facing forward).
- 2Stand with your back erect, knees slightly bent, and feet shoulder width apart throughout the movement.
- 3Start with your arms fully extended and the dumbbells hanging straight down at your sides.
- 4Initiate the movement by flexing at the elbow, curling the right dumbbell up toward your shoulder.
- 5The dumbbell is then slowly lowered to the starting position and the movement repeated with the left arm.
- 6Continue alternating arms until the desired number of reps is completed.
Standing EZ Biceps Curl
- 1For the EZ bar curl, stand with your back straight, your knees slightly bent and your feet slightly bent and feet slightly less than shoulder width apart throughout the entire movement.
- 2Grasp an EZ curl bar using an underhand grip (palms facing forward), with hands slightly wider than shoulder-width apart.
- 3Your arms should be fully extended and pressed against the sides of your torso.
- 4Initiate the movement by flexing at the elbows and curling the bar up toward your shoulders.
- 5When your biceps are maximally contracted, slowly lower the bar to the starting position. Repeat the movement until the desired number of repetitions is completed.
Concentration Dumbbell Curl
- 1To do a concentration curl, sit on a bench, grasping a dumbbell with your right hand, using an underhand grip (palms facing upward). Your legs should be spread wide apart.
- 2Lean forward at the waist and rest your right elbow on the inside of your right thigh, with your arm in full extension.
- 3With your elbow resting on the inside of your thigh, slowly curl the dumbbell toward your shoulder.
- 4When maximum biceps contraction occurs, slowly lower the dumbbell to the starting position. Repeat the movement until the desired number of repetitions is completed. Repeat for the left hand.
Standing Barbell Curls
- 1For the standing barbell curls, grab a barbell using an underhand grip (palms facing upward), with your hands 2-3 inches wider than shoulder width apart.
- 2Stand with your back erect, knees slightly bent and your feet slightly wider than shoulder width apart throughout the movement.
- 3In the start position, your arm should be fully extended, with the bar resting across your upper thighs.
- 4Initiate the movement by flexing at the elbow, and curling the bar up toward your shoulder.
- 5When your biceps are maximally contracted, slowly lower the bar to the starting position. Repeat the movement until the desired number of reps has been completed.
Wrap up
Dumbbell hammer curls are an excellent exercise to work your biceps and forearms. Be sure to add them into your arm training arsenal in order to develop full, balanced upper and lower arms. To achieve the ideal balance of development, I recommend doing hammer curls every third workout, with standard dumbbell curls and cable curls being done on the other two.
| #7 Tricep Pressdown | |
|---|---|
| Sets | 4 |
| Reps | 12-15 |
| Rest Time | 45 seconds |
The tricep press-down is one of the best exercises on the planet for building horse-shoe triceps. Sadly most lifters perform this exercise wrong, so listen up so that you are not 1 of them!
The biggest mistake most lifters make on this exercise lies in the hands and wrist as you extend the bar down. The best way to activate the triceps when you press down is trying to keep your wrist straight and lock your hand into place so your wrist doesn't bend back at all.
Make sure you watch the video above of me performing the tricep press-down and it will make sense. This is one of those tricep exercises that I think is really important to have a mind-muscle connection on, and go slow and controlled in the 10-12 rep range on your working sets.
Go heavy and make sure that you fail in the 10-12 rep range for ideal hypertrophy!
execution
- 1Grab an EZ bar and take your hands on the outer ridges.
- 2Keep a normal foot stance and relax your lower body with knees slightly bent
- 3When you set up, take 1-2 small steps back
- 4think about pressing the EZ bar not only down but also slightly forward
- 5keep your palms locked and your wrist straight. don't let your wrist bend
- 6Focus at the peak of the rep to get a nice hard tricep squeeze
- 7Go back slow and controlled on the eccentric portion
If you want to build your triceps and every other muscle as fast as scientifically possible, make sure you are using the Balloon Method.
The Balloon Method is the style of workout used in the SuperHuman Muscle program, responsible for thousands of fast muscle building transformations including hard gainers.
No matter what your fitness level, the Balloon Method is the first workout that maximizes the 3 science backed ways your body builds muscle in less than 40 minutes a workout and it makes your workouts more intense and a lot more fun.
Click Here to learn more about the SuperHuman Muscle program and see the jaw dropping muscle building transformations!
This is the complete Dwayne “The Rock” Johnson “Suns out, Guns Out” arm workout routine. If you follow this routine you will be able to add on at least 1 full inch to your arms in as little as a few months.
Dwayne ‘The Rock’ Johnson Leg Workout Routine for Wheels of Steel
Although The Rock is known for having massive arms and a gigantic chest, its his Leg workout routine that really sets him apart. Even if you are a guy that only cares about the beach body muscle groups (chest, abs, and arms) – your legs play a vital role in helping to increase your anabolic hormones and build a rock solid foundation.
The Rock has some impressive leg day strength numbers, and has been a lower body workout machine ever since his workout days at Miami when he was training for the NFL.
Dwayne The Rock Johnson Leg Workout Routine for Mass
Here is the Dwayne ‘The Rock’ Johnson leg day workout routine! Make sure you challenge yourself throughout this workout and go heavy AF!
Your legs are one of the most important muscle groups in your body, and going heavy on classic leg day movements will help your body secrete more anabolic hormones.
| #1 Barbell Squat | |
|---|---|
| Sets | 5 |
| Reps | 6-8 |
| Rest Time | 90 seconds |
The barbell back squat is the simplest exercise you can possibly imagine. Yet, with all of the innovation in the fitness industry and the introduction of a plethora of lower body training equipment, including all sorts of leg press and hack machines, the good old-fashioned back squat remains the king of exercises.
But it’s also the exercise that you’ll see most improperly performed and, as a result, the one that causes the most injury. But don’t worry, you’re in safe hands here - I am going to lay out the benefits of squatting, along with a quick overview of correct technique. Then I will drill down to identify and overcome the most common mistakes that people make while squatting. I'll also provide you with some awesome auxiliary squatting exercises, lay out three squatting no-nos and give you the low-down on squatting shoes. It all adds up to the most comprehensive squatting guide you'll read this year!
How to Perform the Barbell Squat
- 1Position an Olympic bar on a squat rack at the level of your shoulders. Load it up and put on the collars.
- 2Position yourself under the bar, with it resting across your mid traps (this is the default position; see the bar positioning section below for more detail on bar positioning for strength vs mass gains).
- 3Unrack the bar and take a step back.
- 4Position your feet shoulder width apart, toes slight outward.
- 5In the start position, your spine should be neutral, your knees slightly bent with the hips back and you should be looking directly ahead.
- 6Squat down until your quads are parallel to the floor.
- 7Push through the heels to explode back up, keeping the hips back and being sure to keep your knees just short of lockout.
- 8Continue in a smooth, piston-like manner to complete your set.
Barbell Squat: Muscles Worked
The barbell squat directly targets the four muscles that make up your quadriceps. They also work the gluteus maximus (butt muscles), hamstrings, hip flexors and core. Yet, this is an exercise where the sum of the parts is greater than the individual benefits. You see, when you squat heavy and hard, you put your body into an anabolic state. All weight training exercises will do this, but the barbell squat does it more than any other. In the 24 hours after an intense squat workout your testosterone and human growth hormone levels will be enhanced.
6 Hacks for Better Barbell Squats
Barbell Squat Hack #1: Bar Positioning

The position of the bar on your back makes a big difference to the effect of your squat. If you are focused more on lifting heavy weight than on developing leg size, then you should follow the powerlifting pattern and position the bar as low as possible across your lower traps.
Doing so will position your glutes and erector spinae in the ideal power position.
However, if you are focused on building size in the thighs, then you want to place the bar high on your shoulders, across the upper traps.
Bar positioning is also important when it comes to working with injury. The higher you position the bar when you squat, the harder it is on your knees. That’s because it forces you to stay more upright, making the knees take the brunt of the load as you descend into the squat.
A low bar position, however, forces you to lean forward slightly in order to keep the bar over your center of gravity. That allows you to load up the hips and back more than the knees. That’s why you should position the bar quite low, along the posterior delts when you squat. If you’re a person with back problems then you should do the reverse, positioning the bar as high as you can on the shoulders.
Barbell Squat Hack #2: Foot Positioning

If you’re a person who regularly squats, you know how important your feet are to your success. The entire force that you are exerting is coming through your feet. If you don’t have them encased in a shoe that will provide rigidity, correct angle, alignment and adequate support, you’re going to be in trouble. Not only will your lifts be disappointing, but you are likely to do yourself some long term injury.
Perform the barbell squat with your feet at least shoulder width apart, your toes pointing slightly outward. Do not stand with your heels on a block or turn your toes widely outward. Doing so will place undue stress on the knees, opening you up for long-term injury. Rather, make sure that you are wearing a quality pair of weightlifting shoes that feature a three quarter inch raised heel (more on this later).
Barbell Squat Hack #3: Upright Torso
In order to place maximum pressure on your quads, you will need to keep your torso as upright as possible through the entire movement. However, you will want to maintain a slight forward bend. Thrust your chest out and look straight ahead as you perform both phases of the move.
Barbell Squat Hack #4: Coming out of the Hole

Getting out of the bottom position (the hole) of the barbell squat is where most people tend to have a form break down. They will either lurch forward with the chest or push the hips backward to initiate the ascent. The key to doing the move most effectively, and therefore putting the maximum amount of stimulus on the quads, is to move the hips and the chest at the same time. Maintain a tight, stable core throughout the movement.
Moving the hips and chest together as one unit is the key to keeping the pressure off the lower back and on the thighs, where it belongs.
Barbell Squat Hack #5: Good Mornings

If your goal is to get bigger legs, you’ve got to squat heavy. And to do that you have to do more than just set after set of the barbell squat. True strength comes from building up your compensatory strength and that happens by developing the stabilizer muscles that go into the squat movement.
The good morning is a great auxiliary move that will build up your squatting power.
When done properly, this is an excellent move to teach the hip hinge, which is crucial for proper squat and deadlift movement. You don’t want the weight to be too heavy on this exercise. Do 3 sets of 10 reps.
Here’s how to perform the Good Morning exercise:
- 1Place the barbell in a squat rack a little lower than shoulder height. Now approach the bar with a split stance and unrack the bar onto your upper back. Step back with feet shoulder width apart and feet tight.
- 2Hinge forward from the waist while keeping your back straight. Allow your glutes to stick out behind you but keep your legs straight. Come down until your upper body is parallel with the floor and then reverse the movement. Keep your knees slightly bent in the top position. Keep your abs tight and your spine neutral. Squeeze the glutes on the way back up.
Barbell Squat Hack #6: Banded Goblet Squats

There are a number of squat variations that you should add into your overall training plan, such as the front squat. Another of the very effective squat variations is the banded goblet squat. One benefit of the goblet squat is that it teaches you to squat to depth. Holding a dumbbell in front of you is not as intimidating as having weight on your back, so you are inclined to squat lower.
If you can’t get out of the hole, you can simply dump the weight to the floor. This will transfer to confidence when you are squatting with the bar.
The goblet squat also has the weight sitting perfectly over your center of mass. This helps you to squat up and down properly. Adding the extra element of a band with help to train your body to keep your quads out rather than the knees beginning to cave as you come out of the hole.
Perform the banded goblet squat this way:
- 1Connect a resistance band to a low anchor and then stand about 18 inches away from the anchor point with a dumbbell nearby. Place the band around your outer thigh and move away until the band is taut. Now grab the dumbbell and hold it by one end in front of your chest.
- 2Squat down, keeping your back straight, to bring your elbows to the inner thigh and then smoothly push into the ground to come back to the start position.
- 3As you get stronger with this exercise, step further away from the anchor point. Perform 3 sets of 10 reps.
What Not to Do When Squatting
Don't Bounce
If you go to the end of your range of motion during an open joint movement, such as dropping all the way down when doing barbell squats, you put your knee ligaments on a stretch. In and of itself, this is not bad. But any additional stress on those ligaments - like bouncing at the bottom of the squat to get back up - can stretch those ligaments out, rendering your knee permanently unstable. That’s the basis for the recommendation not to bounce at the bottom of the squat. It’s the same reason that some exercises that were popular in the 70’s, like the duck walk, are now on the no-go list.

Don't Angle the Lower Leg
When squatting, keep your lower legs as close to vertical as you possibly can. Keeping your shin bones vertical drastically reduces your risk of injury (when you perform the movement, it may help to concentrate on keeping your feet flat on the floor).
Don't Use a Box
Do not barbell squat over a box or a bench. Every time you touch the bench or box, your spine compresses slightly. This will eventually cause vertebral damage.
Should I Wear Squatting Shoes?
The science of squatting has made it clear that a raised heel puts the body in the ideal plane for the perfect barbell squat. It keeps your torso in the correct alignment and it allows you to exert maximum force through the ankles and heels. In the past, this correct alignment was achieved with the aid of a block of wood. However, a block is not the best idea as it places undue stress on the knees.
Fortunately, over the last decade, a market has developed to cater for the need to wear a specially designed Olympic weightlifting shoe. As with any industry, however, the quality on offer ranges from shockingly bad to out of the ballpark good. Unless you know what to look for in a dedicated Olympic weightlifting shoe, you are going to find yourself at the mercy of the sharks out there. Here, then, are the key requirements of a good Olympic weightlifting shoe:
Raised Heel
A three quarter inch wedge in the heel of the shoe will allow you to position your ankles correctly for the descent of the squat. In times past, bodybuilders used to place a two-inch block of wood under their heels when squatting. They instinctively knew that a raised heel would give them the best body positioning. Today, science has proven this to be the case.
Rigidity
In contrast to the majority of athletic training shoes, Olympic weightlifting shoes are very rigid. This ensures that they provide maximum lateral and medial integrity. As a result, the shoe is generally made from a hard material that will not bend to the touch. Often though, the toe box area of the shoe is noticeably softer, providing added comfort in the toe area.
No cushioning
Weightlifting shoes feature a lot less comfort padding than conventional athletic shoes. This helps to keep the foot secure, preventing lateral movement within the shoe while executing such lifts as the squat.
Secure locking mechanism
To further ensure that there is no side-to-side movement of the foot when performing an exercise, a dedicated Olympic lifting shoe will have a very secure foot locking system. Often this will be by way of both a Velcro single or double strap and a secure lacing system.
Grip
The connection to the floor is essential when performing overhead weight exercises. A good weightlifting shoe will feature a very firm grip that will provide absolutely no lateral movement. Many shoes feature a cupping system that provides suction like capabilities to ensure the integrity of the connection between the foot and the floor.
Wrap Up
The barbell squat isn't known as the king of gym exercises for nothing. The back squat will help get you bigger and stronger than any other single exercise that you can do. But the barbell squat can also be one of the most troublesome moves you can perform on the gym floor.

The human body was not designed to be compressed under a weight of several hundred pounds. If you are aligned incorrectly or otherwise use bad squat form, your body, especially the knees and hips, are going to pay the price. In this article, you have discovered everything you need to know to get the maximum muscle building benefit from the barbell squat while avoiding the pitfalls.
So now that you know what to do, go out and squat.
| #2 Leg Press | |
|---|---|
| Sets | 5 |
| Reps | 6-8 |
| Rest Time | 90 seconds |
As a replacement to the squat or simply to complement that major compound exercise, the leg press is a fantastic move to bring into your arsenal.
This one of the top 10 leg exercises will hit your quads, hamstrings, and glutes and will allow for excellent power generation.
execution
- 1Sit down on the leg press and lie back
- 2Rest your head and back
- 3Press the butt into the seat pad and the back into the back pad
- 4Grab the handles and place the feet on the platform at shoulder width
- 5Un-rack the platform and take the initial position, where your legs are slightly bent at the knees
- 6Let the platform go down slowly, maintaining tension on the legs
- 7Once the legs are at a 90-degree angle, push the platform to the initial position
When doing the leg press, be sure to keep the back pressed flat into the back pad at all times (never let the low back round as you drive the weight up) and go as low down as you can go.
Drop sets are especially effective on this exercise, so try stripping one plate off the machine after each set.
Do a few of 10-15 on these with little rest in between and you'll really feel it burning.
| #3 Leg Extension | |
|---|---|
| Sets | 4 |
| Reps | 12-15 |
| Rest Time | 90 seconds |
Isolation exercises aren't typically regarded as huge mass builders, but a leg extension done to the point of exhaustion is excellent for stimulating hypertrophy and also bringing out more muscle shape and definition.
execution
- 1Sit on the leg extensions machine
- 2Get your legs under the pads right above the ankles
- 3Grab the handles and rest your back and head
- 4Extend the legs up, contracting the quads
- 5After a brief pause at the peak contraction, go back down slowly
- 6Repeat the movement pattern
Do this one for high reps and it'll certainly have your muscles screaming.
The leg extension is going to strictly target the quad muscles while all the other lower body muscles get to have a rest.
Because this exercise is less demanding on your central nervous system compared to the other compound moves, you can add some intensity building techniques into the protocol.
For instance, try a T30-45 set, meaning you’ll ditch counting reps and instead, do as many as you can in 30 or 45 seconds. Beware you will feel the lactic acid burn with this protocol.
Or, you can try a mirror rep drop set. Do your first set, drop the weight by 30% and then do a second set after that. Aim for 8-10 reps per set when doing this set-up.
You can also change the direction you're pointing your toes in order to change the nature of the stimulus on the muscle tissue.
Point the toes out to work the inner quad, in to work the outer quad, or straight to work the quad head on.
| #4 Stiff Leg Deadlift | |
|---|---|
| Sets | 3 |
| Reps | 15 |
| Rest Time | 90 seconds |
As great as squats are for your workout routine, no lower body session would be complete without some sort of deadlift added into the mix and the stiff lead deadlift is a great variation to target the hamstrings and glutes. The hamstrings and gluteus muscle are 2 of the largest muscles in your entire body, and sadly many lifters overlook this exercise.
Squats put a lot of emphasis on the quad muscles, while deadlifts hit the posterior chain to a larger degree. By doing a stiff leg deadlift you are able to target the hamstrings and glutes more effectively.
Having both in your program ensures you are building a well-rounded body and aren't going to be at risk for any muscular weaknesses.
The stiff leg deadlift performed with dumbbells is a great hamstring exercise that builds bigger, stronger and less injury prone hamstrings.
The key with this exercise is in the execution, so be sure to watch the video carefully and follow the execution steps laid out below. I recommend that this hamstring exercise become a staple in your workout routine. You should be training your hamstrings just as often as you train your quads to prevent any muscular imbalances.
Try adding in 5-10 sets per week of the dumbbell stiff leg deadlift. This exercise is featured throughout the SuperHuman Muscle 12 week program as well because of how effective of a mass building movement it is.
execution
- 1Grab a pair of dumbbells
- 2Step with your feet closer than shoulder width
- 3Keep the dumbbells by your sides
- 4Maintain a straight torso and slightly bent knees
- 5Bend over slowly, stretching the hamstrings
- 6Go back up, driving the movement through the hips
- 7Contract the glutes up top and repeat
A dumbbell stiff leg deadlift is great for helping to work the hamstrings, glutes, and lower back and can be done quickly and easily as there's no barbell to set up.
To really reap maximum gains from this move, you want to lower the weight down in a slow and controlled manner until you feel a good stretch on the hamstrings.
Watch as you do this move that you aren’t rounding your back out.
If anything, it should remain relatively flat or even arched as you execute the movement.
Do 8-10 reps per set, focusing on taking the weight heavier on this exercise.
| #5 Dumbbell Walking Lunge | |
|---|---|
| Sets | 3 |
| Reps | 10-12 |
| Rest Time | 90 seconds |
This exercise is fantastic for helping to hit your quads, hamstrings, and glutes and will certainly give your cardiovascular system a boost.
If you're someone who shuns traditional cardio, try doing a set of walking lunges across the room for your HIIT. It'll be just as effective.
execution
- 1Grab a pair of dumbbells and keep them by your sides
- 2Step with your feet at shoulder width
- 3Keep the torso straight and take a big step forward
- 4Lunge down without bending over
- 5Go back up and immediately take a big step with the opposite leg
- 6Repeat the movement and alternate between legs
Quite simply, you can’t go wrong with dumbbell walking lunges.
If you want mass, this is sure to do it. Be forewarned, this is also going to give you a great cardio workout as well.
You’ll be gasping for air after each set is completed.
As dumbbell walking lunges are typically done as more of an endurance-based exercise, do consider taking your rep range a bit higher on this move.
Aim for 8-10 reps per leg when doing this exercise, totalling 20 sets before resting.
You’ll be hitting just about every single muscle in the lower body – the quads, hamstrings, glutes, and even the calves to some degree.
Make sure that when doing these, you aren’t leaning too far forward but instead, maintain a nice neutral position with your spine.
By leaning backward ever so slightly, you'll place more emphasis on the glute muscles, helping them become more developed.
This leg exercise can be brutally effective and equally as painful if done right, but persist and you will be rewarded.
Dwayne The Rock Johnson Back Day Workout for a Thick and Muscular Back
Increasing the strength you can “pull” with is a great way to sculpt bigger arms, thicker shoulders, and bigger traps.
Dwayne The Rock Johnson is known for having a giant chest and huge biceps – but its his back day that really sets his physique apart. If you look at The Rock’s physique, he has giant cobra traps and a very wide and muscular V shaped back which makes you look like an absolute monster with your shirt off!
Developing an aesthetic and powerful physique is the goal of most guys, but yet most don’t realize it's your upper lats and back muscles that give you that “V shape.”
If you want to become an anabolic machine and develop a wide V shaped aesthetic physique pay close attention and follow The Rock’s back day workout routine below.
Dwayne “The Rock” Johnson Pull Day Workout Routine
| #2 Underhand Grip Barbell Row | |
|---|---|
| Sets | 3 |
| Reps | 8-12 |
| Rest Time | 90 seconds |
To really dial in on your lats and mid-back, the underhand grip barbell rows is a superior choice when it comes to back exercises.
The nice thing with this is that when using the underhand grip, you’ll really be able to feel the squeeze in the center of the back, targeting all those muscles maximally.
Note that in order to really feel that squeeze however, you are going to have to ensure you row the weight up fully, using the full range of motion. If you can’t feel the squeeze, re-assess your form.
Too many swing the weight upwards, not using the range of motion they should and let momentum drive the movement pattern.
It’s also important when in this position that you keep the back flat as well, never rounding or arcing it, which would just place unnecessary stress on the back and could set you up for injury.
execution
- 1Set the barbell and load it in front of you
- 2Place feet at shoulder width
- 3Bend knees slightly
- 4Keep torso straight
- 5Bend over and grab the barbell with an underhand grip
- 6Extend all the way up
- 7Bend over ever so slightly
- 8Row the bar to the lower portion of the abs, contracting the lower back
- 9Return down slowly
| #3 One Arm Dumbbell Row | |
|---|---|
| Sets | 3 |
| Reps | 8-12 |
| Rest Time | 90 seconds |
In addition to having the regular barbell row in your plan, also consider incorporating the single arm dumbbell bent over row in your back exercises arsenal.
These are great because they allow you to devote all your focus to just a single arm at a time, which is going to help prevent any unwanted muscular imbalances from forming.
Additionally, because all your strength and nervous system output is going towards just one side, you can typically lift more weight as well.
When doing this muscle exercise, it’s important that you focus on keeping your elbow locked in and move through the movement pattern using a very slow and controlled motion. Really focus on squeezing the muscles during the eccentric to maximize progress.
execution
- 1Place a dumbbell on the side of a bench
- 2Put your knee on the bench, forming a 90-degree angle
- 3Place the other leg as you feel balanced and comfortable
- 4Keep torso straight and reach for the dumbbell
- 5Grab the dumbbell and lift your scapula up slightly
- 6Look forward, then row the dumbbell up, keeping the elbow close to the body
- 7Go past the line of the body with the elbow, contracting the back
- 8Return down slowly after brief peak flexion, stretching & maintaining tension on the back musculature
| #4 Seated Shrugs | |
|---|---|
| Sets | 3 |
| Reps | 8-12 |
| Rest Time | 90 seconds |
Though the traps get worked during many other exercises, it is always a good idea to throw in some shrugs for extra stimulus.
When doing this trap exercise, aim to perform 30 seconds time under tension rather than counting reps and squeeze your traps hard at the top of each exercise.
execution
- 1Grab a pair of dumbbells and sit on the bench comfortably
- 2Hold the dumbbells by your sides with palms facing the torso
- 3Shrug the dumbbells and contract the traps up top
- 4Go back down slowly
- 5Repeat for 30 seconds time under tension, without counting reps
#5 Lateral Pull-Down Machine
Sets | 3 |
Reps | 8-12 |
Rest Time | 90 seconds |
#6 Dumbbell Row
Sets | 3 |
Reps | 8-12 |
Rest Time | 90 seconds |
| #7 Wide Grip Pull Ups | |
|---|---|
| Sets | 3 |
| Reps | 8-12 |
| Rest Time | 90 seconds |
This exercise is a definite must in any upper body workout program. It’s compound, it’s challenging, and it’s something that is easily scalable to your own strength level. If you aren’t able to do 8-10 bodyweight pull-ups, start focusing on just lifting your own weight.
If you can lift your own body no problem, then it’s time to start adding more weight.
The pull-up is going to target the lats, biceps, and back, promoting great strength and size gains. If you want to work your biceps to a larger degree, the best way to do that is with a wide grip, parallel grip hand position.
On this exercise, we’ll add one more unique twist at the end to further challenge your body and maximize you’re results – the static hold. On the very last rep you do, you’ll hold that lifted position for at least a few seconds and then very slowly, lower yourself down in a controlled manner. The idea here is to keep constant tension on the muscles and really bring them to that point of higher fatigue.
To keep progression coming, use the same rep and weight scheme as what was noted above for the first exercise.
This is the entire Dwayne ‘The Rock’ Johnson back day workout routine. As you can see, its highly intense and places an incredible amount of volume on your back.
Next time you hit the gym for a giant Cobra shaped back and bigger biceps make sure to try out this routine!


