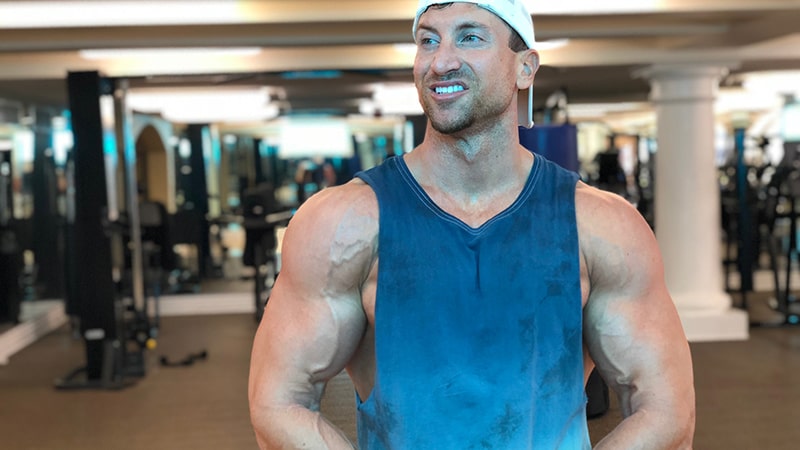
Zac Efron’s workout and diet plan for the movie Baywatch has received a ton of attention because of how ripped and aesthetic he shaped his body for the role. The good news is that you can achieve the same level of fitness model aesthetics if you copy this workout & diet plan blueprint!In the movie Baywatch which filmed summer 2016, you will find a chiseled Zac Efron starring beside The Rock. Believe it or not Zac looks impressive even next to Dwayne “The Rock” Johnson despite only weighing about 170 lbs. Zac Efron has always been known for being ripped as he showed in the movie Neighbors in Summer 2015 – but he took his physique to a whole new level for the movie Baywatch. For his role in Baywatch Zac packed on 10 lbs. of muscle mass to his already ripped frame, and got even leaner!When you are already ripped, and you pack on 10 more lbs. of muscle mass and lose even more body fat – you have the makings of the best Hollywood body but once again it’s something that ANYONE can do with the right amount of discipline and strategy.
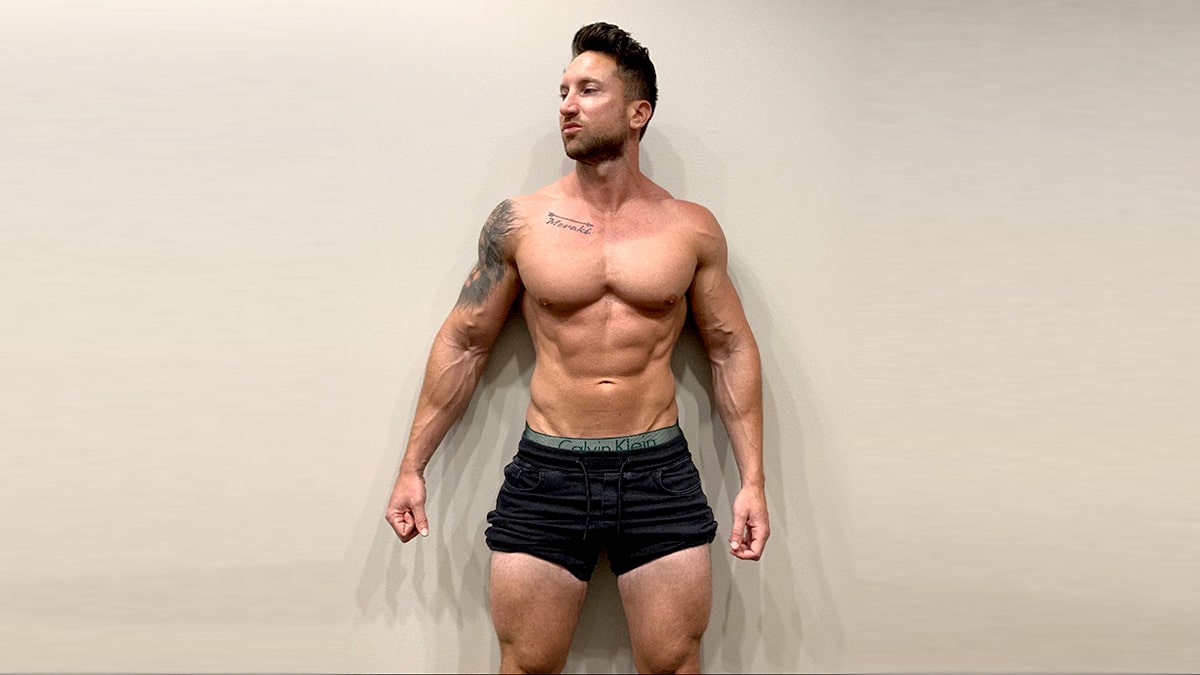
An important takeaway from all of this is that Zac Efron is by no means huge, and you don’t have to get overly muscular to have an incredible looking physique. Believe it or not Zac Efron is about 5 ft. 10 and weighs about 170 lbs. What makes his body stand out is that he has ripped abs, ripped arms, and very good overall aesthetics.
This physique is achieved through focusing on certain muscle groups and minimizing body fat so his abs pop. By focusing his training on the “beach body” muscle groups like chest, shoulders and biceps while training abs and doing different forms of fat loss cardio – you can achieve this physique as well.We are going to give you the exact diet plan that Zac Efron followed to get really lean for Baywatch, and dive into his workout plan for maximum fitness model aesthetics right after.
Zac Efron Workout Plan To Get Ripped To The Bone
Zac had a very athletic training split, incorporating the classic push, pull, and leg split that so many elite athletes utilize for strength and proportion. This is actually the workout split we follow on most of the Superhuman training programs, and it’s brutally effective regardless of what your exact physique goal is.Push days incorporate chest, shoulders and triceps. Pull days meant he was doing back, biceps, and traps. Leg day meant that he was blasting away his quads, hamstrings, and calves. Here is an example of one of Zac Efron’s PPL workout splits that he followed. Keep in mind he would perform each workout twice per week, so he was training 6 out of every 7 days.
Zac Efron Push Workout
| #1 Dumbbell Bench Press | |
|---|---|
| Sets | 4 |
| Reps | 8-10 |
| Rest Time | 90 seconds |
It's the most popular exercise at the gym. Yet, it's not as effective as you might think — especially if your goal is to build strength and muscle mass. The traditional bench press is one of the most commonly recommended exercises for chest-building, but its popularity may lie in its ability to boost our ego rather than build our chest muscles.
When people think of chest workouts, a few things come to mind: the barbell bench press, dumbbell flyes, dumbbell decline presses, and cable crossovers. However, there's one exercise that's overlooked by many lifters – particularly those looking to add mass to their pecs.

When it comes to bench press, dumbbells are better than a barbell. Doing dumbbell bench presses allows you to move your arms independently of each other, thus increasing the range of motion and hitting your pecs from different angles. This means you can hit more of your pecs muscles, instead of relying on your stronger side. Dumbbells also work other important muscles, like the triceps — so your arms don't get lopsided and unbalanced.
How To Do A Dumbbell Bench Press
The first step to doing a dumbbell bench press is to load the weights. For light to moderate weight, it's ideal to have a friend hand you the weights once already lay down on the bench. If that's impractical, you can load them from the floor to your knees.

When you lie down on a bench, it's important to squeeze your shoulder blades together. For this reason, it's necessary to keep your feet actively pressed against the ground so that more muscles will be engaged during the lift. With your back acting as the base of this lift, you can tense your back muscles by squeezing your shoulder blades together.
You don't want to launch one too hard and risk hitting your head! Start by holding the dumbbells over your chest, with arms fully extended.
When you think of the back as the base of this exercise, you can really engage your lats. By tensing your scapulas and pulling them together, you're engaging the back muscles and preparing to lift the weight up. This will engage more muscles in your body to help with the lift.

While keeping a slight bend in your elbows, slowly lower the dumbbells in front of your body. Be sure to keep the weights close to the center of your body. At the bottom of the dumbbell press, the weights should be directly below your upper chest.
Your goal is to keep the dumbbells floating in a specific pressing path. Move them in a straight line from your shoulders to your chest. Don't let the weights move out of that path, or you risk damaging your muscles and ligaments. Lower the weights until the ends of the dumbbells are just above your shoulders.
Benefits Of The Dumbbell Bench Press
Though using a barbell might be the more traditional choice, there are several reasons why dumbbells are becoming more popular. Many believe that working out with dumbbells provides a greater range of motion than using a barbell, and this means that you can target your pecs more effectively during the exercise.
The bench press is the king of upper-body exercises for a reason: it builds strength and muscle mass in your chest, shoulders, and arms. Here are just a few benefits to this dumbbell exercise.
More Natural Grip

For people who have previously experienced shoulder injuries, dumbbells might be the ultimate training tool. Unlike a barbell, dumbbells allow your arms to move through a greater range of motion — letting you grab the weights with a more natural grip and letting your elbows flare outward.
You can take your dumbbells with you anywhere and work out when you find the time. The versatility of the dumbbell comes into play here again as you can go fully neutral with your grip (palms facing each other as you grip the dumbbells), and with elbows tucked in to emphasize the triceps, offering an alternative to the close grip standard barbell bench.
Less Risk Of Injury

Safety is always paramount when lifting weights. With a lighter weight, you're free to move around without feeling constrained by a barbell on your back. If you fail a rep without a spotter, getting the weight off of your chest is much easier with dumbbells than it is with a barbell.
For those who want to push themselves to the point of failure, but don't have the option of a spotter, dumbbells are where it is at. Typically you'll be doing less weight with dumbbells because of that increased freedom of movement.
Harder To Cheat

While you will have to lower the weight you're lifting with the dumbbells, you'll find that you are training the muscles more so than you would when using the bench press.
After all, you lose some of the leg drive that is inherent in a good bench, and the back arching that shortens the lift — both of which give you an advantage. Instead, with dumbbells, you are training the muscles and not so much the movement.
Complete Muscle Activation

Most importantly for those who hit the bench purely to get jacked, the muscle activation in the chest (the target muscle) is no different than doing bench with a barbell. The amount of time the target muscles the pectoralis major and anterior deltoid are activated is also not statistically significant between the DB and BB bench, whereas the dumbbell fly lagged, relegating it to a secondary lift.
Enhanced Bicep Training

A study has shown, based on electromyography readings, that the biceps brachii is highly active when dumbbells are used during bench press exercises. The reason for this could include the instability of the exercise- a key factor in muscle recruitment.
Each exercise required more stability than the last, leading to increased muscle activation in the biceps brachii and other muscles.
Better Range Of Motion Than The Barbell Bench Press

Barbells are great, but dumbbells do certain things better, including taking your muscles farther through a longer range of motion. This extra damage not only results in more growth, but it also makes the exercise more joint-friendly.
The flat bench press is a classic lift, but because there is no barbell anchored to your chest, you have more range of motion than you would with a barbell. This means that your chest gets more stretch, which means more muscle damage and thus bigger gains.
Improved Stability
The dumbbell bench press is just as effective as the barbell version because each arm can be worked independently, much like a single leg squat. The built-in instability of the dumbbell bench press challenges your muscles to fire more rapidly, strengthening joint stability and overall balance in the process.
Greater Strength
Performance athletes choose weight lifting over bodybuilding because they want to develop strength rather than size. For strength building, athletes should use heavier weights for lower reps. Tempos and ranges of motion can remain similar to hypertrophy training, although some positions might benefit from slow rep speeds and slower ranges of motion. To start, try three to five sets of five to eight reps using a very heavy load. Rest 90 seconds between sets.
More Endurance
Lifters who want to build muscle endurance should aim for between 20 and 30 repetitions in a set, with 2 to 3 minutes of rest between each set. This is a great way to build muscular endurance for sports that involve short bursts of force with little time for recovery, like football or basketball.
Muscles Worked By The Dumbbell Bench Press
The dumbbell bench press is an extremely effective movement for increasing upper body strength and muscle mass for both aesthetics and performance. Below are the key muscles stressed during the dumbbell bench press.
Pecs
The chest is the primary muscle group activated during the dumbbell bench press. With dumbbells, many lifters find that they can engage in a greater range of motion during the eccentric aspect of the lift. This lengthens and stretches the muscles in a way that isn't present during a barbell bench press.
Triceps
In the bench press, the triceps are critical for two things. The first is to stabilize the elbows during the initial descent of the dumbbells. Without stable elbows, there would be no way to press the dumbbells up. The second function of the triceps is to extend the elbows in a lockout at the top of the bench press movement.
Shoulders
The shoulders, or deltoids, have three separate muscles — the anterior (front), middle, and posterior (back). However, the primary movers are the anterior deltoid and the medial deltoid, which function to adduct (bring towards midline) and abduct (move away from the midline) the humerus (upper arm), and are most active during pressing movements like the bench press.
| #2 Incline Bench Press | |
|---|---|
| Sets | 4 |
| Reps | 8-10 |
| Rest Time | 90 seconds |
The barbell incline bench press is my favorite upper body mass builder due to its emphasis on the upper chest and shoulders.
Contrary to popular belief, the barbell incline bench press is a great exercise to build your shoulders as well as your triceps if you have a narrower grip.
With the barbell incline bench press we are going to be performing 3 heavy working sets in the 8-10 rep range with a focus on lowering the weight slowly on the eccentric portion, which will translate into faster muscle gains.
I recommend that you count for 2-3 seconds on the way down on each rep and then explode back up.
The barbell incline bench press might be the best mass building exercise for the upper body, and is extremely effective for building your upper chest and shoulders. I recommend you perform it twice per week for maximum aesthetics.
On the third set you are going to be doing a dropset, where you will rep out the heavy working set for 8-10 reps until failure, then drop the weight by about 50% with no rest and pump out another 10-12 reps, or as many as you can do.
This will add some extra intensity and overload right on your upper chest, shoulders, and triceps!
| #3 Barbell Overhead Press | |
|---|---|
| Sets | 4 |
| Reps | 8-10 |
| Rest Time | 90 seconds |
The barbell overhead press (or "military press") is a powerhouse of an exercise that works the muscles of the shoulders and upper back.
When executed with precision and technique, it can not only define your shoulders but also shape your upper back to give you a broad, balanced physique. This total-body lift effectively develops the shoulders and upper back, two of the most vital areas of the body for strength and muscle tone.

Overhead pressing strengthens the entire body. The press isn't just for the shoulders and arms—the standing overhead press is also a great way to work the abdominals and hips, as well as helping to improve your leg strength.
The overhead press may be the most effective exercise for developing bigger shoulders, upper back, and triceps. It's a favorite of fitness enthusiasts because it's an incredibly effective way to develop these muscle groups. The weight you use for the press must be heavy enough that your muscles won't tire out and at the same time light enough that you can complete 8-12 reps in an extended set.
Before You Perform The Overhead Press: Safety First!
You'll want to stay away from the overhead press if you're new to strength training because of its heavy loading and nervous system demands. While it's one of the most impressive lifts and it's fantastic for building your upper body, you need a solid and established fitness baseline and a grounded education in strength training before making a foray into the military press. The truth is, some folks' bodies just can't handle training with heavy weights overhead without injury.

The barbell overhead push press and other overhead press variations can be dangerous when performed by weightlifting amateurs. If you don't have the proper upper body strength to manage the weight, you can cause serious injury on your very first rep. Even strong lifters must take great care to perform the overhead press with the appropriate technique to ensure that they don't cause muscle strain on their neck, shoulder blades, arms, pectorals, or core muscles.
Most people can't afford a personal trainer, but there are some exercises you can do to check your core, arm, and shoulder strength to find out if you're ready to start adding the overhead press to your lifting regime.
Shoulder Blade Touches

Stand straight with your arms at your sides and feet at shoulder-width apart. Reach both arms behind you and touch the tops of your shoulder blades. If you can do this without touching anything other than your arms, then you have the flexibility to perform the overhead press.
If you can't, you can still perform this exercise with dumbbells or kettlebells, but don't pick up the bar quite yet.
Overhead Reach

Stand in front of a mirror, arms at your sides. Raise both arms overhead. If you can, raise both arms parallel with your ears—without your ribs moving, and without anything else moving.
To pass this test, you need to be comfortable while standing straight with your arms upright and make sure your ribs are still.
If you've failed, don't overanalyze why. Just attack your next workout with more power and precision. Don't hit the bar just yet, but you can start trying a light overhead dumbbell press (or kettlebells).
When To Use The Overhead Press
A multijoint movement should always be done first in your workout. While you don't necessarily need to perform overhead pressing first in a workout, it's best to do this heavier exercise as your main lift especially if you're just starting out.
Depending on the lift variation, place it as an accessory movement or a support exercise for your primary lifts. This heavy exercise is taxing on your CNS because of its full-body nature and relatively heavy loading.
Planning Your Overhead Press
Form is essential when it comes to complex movements, especially when lifting weight that's too heavy. When form breaks down during a training session, injuries increase the likelihood of poor results. As a result, athletes are better off choosing sets and reps schemes that allow for form and posture maintenance.
The ideal rep range for overhead pressing is 3-8. Any more or any fewer reps and you risk breaking form, muscle strain, and fatigue. This has been proven time and time again in studies on overhead press form with novice to advanced lifters. On the other hand, 3-8 rep ranges are also known for increasing strength gains over longer durations of training.

Sometimes increasing the number of reps can lead to plateaus rather than progress. If you're going over your 8-rep goal, try adding more weight or reducing rest time. As with any workout, training balance is typically the answer more than going to extremes.
For many new lifters, dumbbell and kettlebell variations are their main lift. The overhead press is just one example of the many lifts that can be done with a lighter load and easier form.
Perform dumbbell or kettlebell overhead press sets in the 5-12 rep range with lighter loads, and you'll give your body the time it needs to grow. The 5-12 rep range is ideal for these exercises since it builds strength without setting you back in terms of your range of motion or exertion.
How To Perform The Overhead Press

To perform an overhead press with proper form, stand with the bar on your front shoulders. Position the bar on your shoulders, and grab it with an overhand grip, just outside shoulder-width apart. Straighten your arms until you are in a rigid pressing position, elbows locked at the top, keeping a straight bar path. At the top, hold the bar for a second before lowering it back to your front shoulders.
The overhead press with dumbbells and kettlebells is similar in execution but with one slight difference. The hands start out in a neutral position at the bottom, like a dumbbell press. Rotating the arms parallel to the ears as you press makes use of the shoulders' entire range of motion. The rest is the same. As the weight is moved up and back, the elbows extend as they are pressed up and back.
Overhead Press Form And Stance
When doing the overhead press, your heels should be under your hips. This means that you should have a narrow stance. But your heels shouldn’t be touching. Stand similarly to how you stand when you perform the deadlift.
Lower Body
Staggering your feet might improve your overhead press, but it can also hurt your lower back and hips. Overhead press with your feet parallel and shoulder-width apart to evenly distribute the pressure on your back and hips.
You can turn your feet out slightly, but make sure that they are aligned horizontally when you look down. Don’t stagger your stance by putting one foot forward.
Your feet should be flat on the floor when you overhead press. This increases body balance and allows you to use more of your body weight to lift the bar. To optimize your bar control, keep your forefeet, heels, and toes firmly on the floor.
Avoid lifting your toes or raising your heels. Use only the muscles in your feet and legs to overhead press, not momentum from your upper body.

Keep your legs straight and squeeze your glutes. Your shoulders are doing the work, not your knees. Hyper-extending your knees is cheating — you’re taking the work away from your shoulders.
Squeeze your quads and keep your legs straight. If your knees hurt, you’re probably hyper-extending. If you still can’t lock your knees, decrease the weight by 10%.
A push press is not the same as an overhead press. The push press uses your stronger hip muscles to drive the bar off your shoulders. It allows you to press heavier weights, but it doesn’t work your shoulders like an overhead press does.
If you bend your hips while doing an overhead press, you will cheat yourself out of better results. You should never cheat during a workout. Think about squeezing your glutes to keep your hips straight.
Grip

Your grip is very important for the overhead press. If you want to do this exercise safely, you must wrap your thumbs around the bar.
This way, the bar cannot slip out of your hands and hit you in the head. It also makes you stronger because you get to squeeze the bar harder.
This helps engage your arms, shoulders, and chest muscles more — making them stronger too. Plus, a full grip allows you to overhead press more weight without causing bad form.
Should You Stand Or Should You Sit?
What's the difference between doing this movement standing vs. sitting? When you do barbell movements with weights, your body must use stabilizer muscles in each shoulder joint to keep each body part pressed against the weight at all times, or you'll experience a painful injury. Strong, stable shoulders help prevent you from bending over during lifts.
Standing Overhead Press

The standing barbell press takes more total-body strength because it builds more core stability, trunk stability, and tension. It also builds more shoulder strength. However, if you're already in fantastic shape and strong, the seated overhead press will build a higher percentage of your overall upper-body strength, but not necessarily more overall strength.
Standing overhead presses require more core stability and total-weight tension than the seated variety because your hips and legs need to be engaged to prevent you from bending over.
Seated Overhead Press

Seated overhead presses are best for those with stronger core strength and less flexible joints. They're typically easier to perform since you stabilize your body with the bench.
This makes them a good choice for lifters who are newer to weightlifting exercise and those who aren't in the best of physical shape. They're also the best alternative for lifters with lower-body disabilities who want to utilize the ultimate upper-body lift.
Muscle Groups Worked By The Barbell Overhead Press
The overhead press utilizes a variety of muscles to lift the weight. Your shoulders and arms are the prime movers that press the bar overhead. But everything between your shoulders and the floor should stay tight to balance you as well as keep you from dropping the weight on your neck or elbows. The overhead press concentrates several muscle groups all at once to build strength and power.
Arms
Straightening your elbows works the muscles on the backs of your arms, your triceps. Their size makes them stronger than any bicep. Your forearm muscles also jump into action to hold the weight.
Back & Shoulders
To overhead press, lift the bar with straight arms so that your feet don't leave the floor. This targets the muscles in your shoulder: your front, side, and back deltoids. Muscles are developed evenly with heavy weights so that you build wider shoulders.
Core
Your core muscles are the foundation of a strong body. They stabilize your torso while you press the bar overhead. Stronger abs are leaner abs, especially when paired with a balanced diet.
Legs
Your legs balance your body while your arms and shoulder press the bar. This works your hips, thighs, calves, and ankles. The overhead press doesn't work these muscles quite like squats because your legs don’t move during your reps. Instead, they stay straight. They have to support the heavyweight of the bar. If you want to work your lower body, squats are a better choice.
Important Safety Considerations For The Overhead Press
Any exercise can cause unnecessary strain or injury when done incorrectly, but the overhead press is a full-body workout using a heavy free weight overhead. This makes it one of the more hazardous lifts you can perform, and a number of things can go wrong if you're not adequately prepared or if you don't have enough strength to perform the overhead press correctly.
Before adding the overhead push press to your workout routine, perform the safety checks listed above and consider these safety risks associated with the lift.
Watch Your Shoulders
The overhead press has been proven beneficial for shoulder health, but you need a good form. It strengthens your shoulders and rotator cuff muscles. These muscles secure your shoulder joints and prevent dislocations. Good form also prevents muscle imbalances in the bench press by strengthening your rear shoulder muscles. However, poor form will hurt your shoulders. The bench press is a great exercise to do for strong shoulders that will then help with your overhead press form.
Do shoulder shrugs. Start by holding the bar up high with your elbows 45° in. Don’t use a grip wider than this or your elbows will flare like you do on the bench press. Press the bar in a vertical line until your arms are straight at the top. To finish the rep, lift and tilt your shoulders. The barbell should stay on a straight bar path directly over your shoulder joint while you do this.

Shrugging is a key to strong shoulders. This will activate the trapezius muscle, rotating the shoulder blade out and lifting the bony process of the upper arm bone (humerus). This creates space between the top of your humerus and your acromion, which can alleviate shoulder pain and decrease inflammation.
If you don’t shrug at the top of your bench press, you are putting yourself at risk for injury.
Be Ready To Drop The Bar
People are scared of overhead pressing when they’ve never done it before. They think that the barbell will fall on their head and crush them before they even get a chance to finish the lift. However, this is a myth. A weight that is too heavy for you to control won’t go as high as your head. You'll fail at the bottom because it's too hard.

When doing the overhead weight press, there are only two ways you can drop the bar on yourself. The first is to use a thumbless grip. If this happens, the bar will fall out of your hands and hurt you. It’s better to have a full grip with your thumbs wrapped around the bar.
Another way to drop the bar is to not lock your elbows at the top of the move. The weight will collapse over your head if you fail to lock your elbows. Always lock your elbows at the top of the overhead press.
You don’t actually need to overhead press inside the Power Rack with safety pins set. You can simply go right into your shoulder press when you fail a rep. If you prefer to overhead press inside the Power Rack with safety pins set, arm yourself with confidence and do it.
Benefits Of The Barbell Overhead Press
You don’t need to isolate your shoulder muscles with lots of different exercises. The overhead press gets the job done. It works your entire shoulder girdle evenly, allowing you to lift heavier weights.
The overhead press strengthens your rotator cuff muscles. It's a safer and more effective way to prevent and fix shoulder injuries than internal and external rotation exercises with dumbbells. Plus, unlike the bench press, it strengthens the back of your shoulders, not just your chest.
| #4 Weighted Dips | |
|---|---|
| Sets | 4 |
| Reps | 8-10 |
| Rest Time | 90 seconds |
If you want activation in your lower chest, this exercise is top rated.
Skip it at your own risk. Chances are you’ve done these before so you don’t need me to tell you much about them.
All I can say is get them in. I like starting all my chest workouts with weighted dips as a primer for what’s to come and to ensure that I’m never skipping over them because I’m just too tired to get it done.
execution
- 1Wrap a weighted belt around your waist
- 2Get up on the parallel bar
- 3Bend elbows slightly to drive the tension through the chest, shoulders and triceps
- 4Dip down slowly, stretching the chest
- 5Push back up explosively, contracting the chest
Note that you should avoid locking out the elbows at the top.
I recommend doing 3 sets total of 8-12 reps for weighted dips.
You’ll want to go heavy enough on this exercise that you do feel the muscles working hard, but not so heavy that you begin to let the triceps start taking over.
This is a common mistake that is made far too often by many guys.
While you always will get some tricep activation, remember this is a chest exercise not a tricep one.
Zac Efron Pull Workout
| #1 Barbell Deadlift | |
|---|---|
| Sets | 4 |
| Reps | 8-10 |
| Rest Time | 90 seconds |
The barbell deadlift was bred out of necessity. It was built specifically for the military and its purpose was to teach soldiers how to use their strength properly. No matter your body type, you can learn to barbell deadlift properly.
We're going to cover everything you need to know to perform the barbell deadlift properly so you can add this critical exercise to your gym workout routine immediately.
How To Perform The Barbell Deadlift
The barbell deadlift is a challenging movement because you start each rep at the bottom position. This means that your back, legs, and arms must be strong enough to deadlift the weight from the floor.
In a barbell deadlift, the “dead” refers to dead weight. That means you must use proper form to allow your barbell to start from a dead stop on the floor every time, rather than just moving up top.
Setup And Placement
A barbell deadlift should be set up with heels placed hip-width apart and your feet parallel, shoulder-width apart. This is because the distance between your heels should be hip-width apart. So if your hips are wider, you should stand with your heels placed further away, and vice versa.
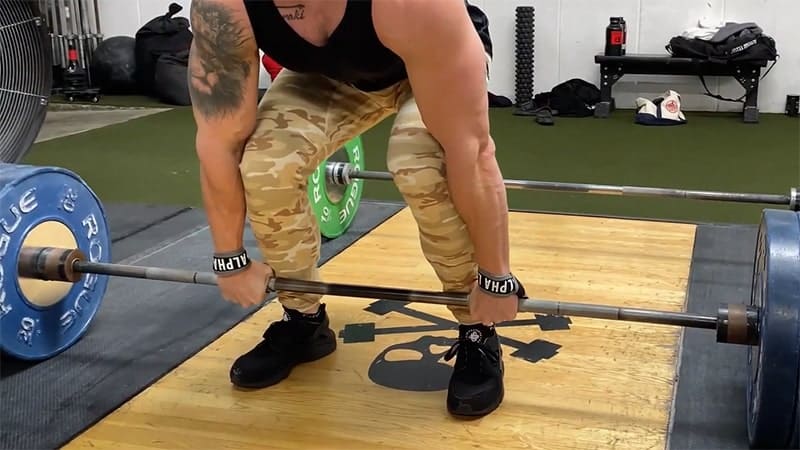
The barbell should always start over your mid-foot because when the weight leaves the ground, it will pull you forward.
The barbell should never start over your toes because when the weight leaves the ground, it will pull you forward. This puts the bar away from your center of gravity and further from your balance point. This will make you lose balance, feel harder on your lower back, and put more pressure on your shins.
Deadlifting with your squat stance is dangerous. You need to create space for your arms when you set up. If your legs are too far forward, they will block your arms from moving freely. This will make you pull with bent arms which puts a lot of pressure on your biceps and elbows.
An optimal hip position for your barbell deadlift depends on your build. If you have long thighs, your hips will be higher than if you have short thighs. Regardless of build, proper deadlift positioning involves having a more vertical torso with the hips and knees in the highest possible position, feet hip-width/shoulder-width apart. If you set up properly and are meticulous about your form, you can barbell deadlift safely and productively whether you have long or short thighs.
When you do deadlifts, bend your knees out at shoulder-width so that they point out at about 15 degrees, over the top of your toes. Do this while you set up and while you pull the weight up. This will help your range of motion through your hips, upper back, and posterior chain.
Grab The Bar
When you barbell deadlift with a poor overhand grip, pain will develop in your hands. An improper overhand grip causes the bar to slide down your palms and place pressure on skin folds. This hurts and leads to calluses that tear easily.

To perform the exercise correctly, grab the bar narrow. Narrowing your overhand grip will make your hands vertical when you look at them from the front. This will help decrease the distance your arms must move in order to lift up the weight, and you can deadlift more weight with a narrow grip.
Grab the bar with your palms toward you. This is the standard or double overhand grip. You can use the mixed grip, but it’s not an everyday thing. Save it for when your grip strength fails and sticks after too much deadlifting. Start with a normal grip on most sets, though.
Lift The Bar
The barbell must start below your midfoot and move up in line with your shins because those are the supporting muscles.
Start with your shins against the bar. If you place them correctly, it will be easier to lift the bar over your knees and thighs. Don’t let it drift away from your body or it will cause pain in your lower back. To protect your legs, wear pants or socks that are long enough to cover your shins.
Lift the bar in a vertical line. This is the most effective way to pull because it is the quickest path from ground to lock-out. The shortest route is a vertical bar movement. It should not slant forward because that makes the bar travel path longer and throws off your balance.
Take a big breath, and then deadlift the weight off the floor.
Slowly pull up on the weight. Don’t push with your arms, and don’t try to deadlift the weight without straightening your elbows. Pause first, and then pull the weight into your shoulders, breathing deeply. Don’t rush and keep your movement even.

If you find that the bar is moving too far away from your midfoot during a power clean, try resetting. Stand up, get the bar still, and get your midfoot back under the bar. Then get in the proper position and pull. Don’t attempt to pull the weight over your foot, because you might not be able to get in a proper position.
Locking your knees at the top of every rep is an important part of performing conventional deadlifts correctly. This strong, locked position is key to success because it gives you a stable frame to hold the weight. Don’t cheat yourself by not locking your knees at the top of each rep.
If the bar will not budge, your grip strength might be insufficient. Place chalk on your hands and try again, this time with a mixed grip. It will provide you with a better grip, and you should be able to lift the weight. Make sure you don’t give up too early; if the bar still will not move, it’s too heavy for you.
Lower The Bar To Finish Your Deadlift
Going down should follow the path of going up. To lower the bar, you should move down in a straight vertical line as this is the shortest distance to the floor. It should pass just above your knees to decrease stress on your lower back.

Lower the bar keeping it in contact with your legs to decrease the downward pressure from your body weight on your lower back. Your spine must stay aligned in its neutral position.
Then lower the weight by moving your hips and knees back. Keep your legs almost straight while moving mostly from your hips. The goal is to keep your knees back and out of the way of the barbell, so you can lower it in a vertical line to your midfoot. If you bend your knees, you'll struggle. They’ll come too far forward and block the barbell from reaching the ground.
Benefits Of Adding Barbell Deadlifts To Your Workout
The deadlift is a great strategy to build big muscles and increase stability. A recent study from Texas Tech found that after ten weeks of doing the deadlift, participants gained significant amounts of both muscular strength and muscular stability, especially women who had little experience with the deadlift or weightlifting.
Improved Full-Body Strength
As you build muscle in your abdominal area, your back and posterior chain become stronger. That means it’s less likely to hurt. That also allows you to work out longer and deadlift more weight. Strong muscles make an indelible impact on your performance at the gym and when lifting weights. In addition, this full-body move can save time because it works many muscles at once in a super short amount of time.
The deadlift is a key exercise that engages and strengthens the lats. However, bigger lats are not just cool; they also signify strength and functionality. Yet, for long-term health, you should take extra care to avoid back pain. Back pain is a leading cause of disability in Americans of all ages, so don't forget to strengthen your back muscles if you're training for strength. A key way to do this is by doing deadlifts or other posterior chain exercises.
Better Posture And Form
Deadlifts are an effective way to train a neutral spine, hips, and knees. They are the perfect exercise for building good movement habits that apply to your everyday life. For example, when you go to work you’re less likely to bend too far forward and hurt your back while picking up a heavy object, which is the most common type of spinal injury in the workplace.
Deadlifts are a great strategy for improving core strength, core stability, and posture. The movement involves most major leg, lower back, and core muscles — which means that it also strengthens the muscles responsible for proper posture.
Improved Recovery
Deadlifts are excellent for increasing your vertical leap, reducing skeletal muscle loss in the elderly, increasing bone density in athletes who play contact sports, and facilitating functional recovery after a lower-body injury.
Better Hormone Levels
Deadlifts work everything: thighs, core, neck, back, and grip. This means your testosterone and growth hormone levels will skyrocket. Lowered body fat and better moods? Yes! Higher immunity, better sex drive… yes to all that, too!
Stronger Grip
Old-school, hardcore athletes were built strong. They worked hard and had big muscles — specifically big biceps and strong quads. But today, many athletes don’t have that same kind of strength. Often, their grip is the weakest link in the chain. This makes it hard for athletes to exercise. Deadlifts and other power exercises can be especially frustrating when your grip is weak. You can also try things like the double overhand grip or hook grip. Don't barbell deadlift using the underhand grip.
Plenty Of Variations
Of course, you want to stay fresh in the gym. Have fun with deadlifts. There are plenty of ways to mix it up: the Smith Machine deadlift, the Sumo deadlift, the Romanian deadlift, trap bar deadlifts, and rack pulls. So many options! All methods offer different benefits and can find a place in a well-constructed training program.

The Romanian deadlift is similar to the conventional deadlift, but it differs in that it begins from a standing position and engages the glutes and hamstrings more. The deadlift begins from the bottom position, engaging more of the quads and mid-back. It is easier to lift heavy with a conventional deadlift than a Romanian deadlift.
The sumo deadlift, which is done with the hands inside of the thighs and a wide stance, is one of the best deadlift variations around. A sumo deadlift is generally done with a wider stance than the conventional deadlift and with the hands inside of the lifter’s thighs.
Find a variety that you enjoy for when you are ready to try something different. When you want to switch things up, there are plenty of movements available for you to choose from.
Stronger Bones
Deadlifts build muscle strength and testosterone, which make the bones in your body stronger. This decreases the risk of osteoporosis and makes you less likely to break down. It’s important for you to build and maintain bone mass, especially as you age.
Muscles Worked By The Barbell Deadlift
The deadlift is a powerhouse exercise. It works multiple muscles and can be a full-body workout. There are a variety of muscles that are worked by deadlifts, including the hip extensors, anterior core, glutes, lower back, latissimus dorsi, biceps femoris, hamstrings, spinal erectors, deltoids, trapezius, serratus anterior, rhomboids, and others.
Deadlifts work every major muscle in your body. Although they’re doing different things, the primary movers are the legs. The back muscles keep you from sagging and let you maintain a good posture. The arms are the ones keeping the weight on the bar.
Shoulders & Back
Back muscles contract and relax to keep your spine in place and gravity pushes it down. Deadlifts are an excellent back builder because they engage all of your back muscles. They work the back and shoulders more than any other exercise, which is why they're a strong choice for anyone's workouts.
When it comes to back workouts, deadlifts and barbell rows are the best. If you add pull-ups in there, you’re set for a strong upper body. Use heavy weights and move quickly to get the most out of this workout circuit. You won’t need much else to build a v-shaped back. Work out two to three times a week and you'll add tons of strength and tone.
Arms
When you lift, the bar puts tremendous pressure on your forearms and mixed grip — which is where you put the most resistance. Your mixed grip tightens to support the bar as you attempt to lift it off the floor, but your biceps and triceps must also work against this resistance. They work to straighten your fingers and squeeze the bar as you pull it up.
Chest & Abs
The core and obliques are what keep your back strong and healthy through physical activity. If you don't use them, they will deteriorate and weaken over time. Diet is also paramount in the development of a functional and strong core. Develop proper body mechanics by working the core muscles regularly with exercises such as farmer's walk, glute-ham raises, single-leg hip thrusts, and of course—the barbell deadlift.
Traps
To deadlift, your trapezius muscles contract to hold your shoulders in place while also transferring force to the bar. The heavier you deadlift, the harder your traps work, and the bulkier they get! You also don’t need to do shrugs mid-rep like you do with the barbell overhead press.
Glutes
In the deadlift, your glutes are targeted throughout their entire range of motion. This is the main reason why it’s one of the best exercises for the butt. Strong glutes mean greater endurance, power, and pain prevention. The gluteus maximus is the biggest muscle in the body and of the three powerlifting movements, nothing targets the butt as hard as the deadlift. Strong glutes mean a heinie that drives your machine.
Legs
The muscles in the back of your legs are straightening your knees, while the front of your legs are straightening your hips. The muscles in the back of your thighs are working first while you control the weight in a deadlift starting position. Then the muscles in the front of your thighs come into play as you fully straighten your knees until standing all the way up.
Barbell Deadlift Safety: Form And Injury Risks
Deadlifting is a great exercise that builds leg strength, but lifting with poor form can decrease strength and increase injury risk. To perform deadlifts correctly, you need to move the weight up from the bottom with a pushing action. Instead of lifting the bar vertically, you pump it.
Deadlifts can turn a weak back into a strong one by strengthening the muscles in your trunk. The deadlift increases back endurance and builds safe movement habits. Gravity pulls the bar down when you deadlift. Your muscles contract to fight gravity and stabilize your spine so it doesn’t bend.
Even if you’re naturally built with short limbs and a long torso, you can figure out how to do a bar deadlift the right way. Those with shorter torsos and longer legs often set up lower than those with longer torsos and shorter legs. Don’t bend your spine to mimic someone else’s deadlift form unless you have the same physique.
When performing the deadlift, it is highly important that you maintain a good deadlift form. A bad way to perform this exercise is to pull from a bent lower back. This can cause injuries to your spinal discs such as bulged discs and pinched nerves. It can also cause back strain or herniated disks.

When you deadlift, keep an inward curve in your lower back. Start by using your knees to lower yourself to the bar, then slowly pull the bar to your body. Maintain even the pressure on your discs by keeping a neutral spine throughout the movement. This decreases the chance of injury while doing the deadlift with heavy weights at home.
| #3 Lat Pulldown Behind Head | |
|---|---|
| Sets | 4 |
| Reps | 8-10 |
| Rest Time | 90 seconds |
The lat pulldown behind the head is one of the best back exercises on the planet for widening your back and building bigger lats. This move will primarily target the upper back and secondarily, the biceps and forearms. If you are looking for a meaty upper back, do add this to your back exercises list.
If you want to take the lat pulldown behind the head to the next level, I suggest you implement the Balloon Method in all your back workouts so you can maximize the 3 science backed ways your body builds muscle. This is what we do in the SuperHuman Muscle program, and if you are eating enough you will pack on mass much faster.
For a really good pump I recommend that you go for about 10-12 reps and really focus on the stretch of the exercise and your mind-muscle connection in the lats. I like to tell myself to keep my elbows forward as I pull down as well, and this really lights up your lats.
execution
- 1Grab the pulldown bar and sit down on the seat
- 2Angle the torso slightly forward
- 3Look down and pull the bar down and behind your back
- 4Contract the back at the bottom, then go back up slowly.
- 5.Keep your elbows forward as you ascend down.
| #4 Barbell Curl | |
|---|---|
| Sets | 4 |
| Reps | 8-10 |
| Rest Time | 90 seconds |
Biceps - big, bulky, defined biceps are anyone's goal in the gym. There is no doubt about that. The barbell curl is perhaps the most underrated bicep exercise on the block. If done correctly, it can craft significant bicep gains. Here is the low down on bicep curls with a barbell.
How to Perform the Barbell Curls for Bigger Biceps
- 1Standing in front of a barbell, grip it slightly wider than shoulder-width apart, with an underhand grip. Your palms should be facing upwards.
- 2Stand with your back straight and your feet hip-width apart. Look forward.
- 3Begin curling your arm upwards. Keep your elbows tucked in and stationary.
- 4Your body should be completely still, only your arms should hinge at the elbows. Don't bring the bar up to your shoulders. It should reach the mid-chest level.
- 5Squeeze at the top of the curl. Slowly begin lowering back to the starting position.
- 6You should control the weight on the downward return and engage all the muscles in the arms.
- 7Repeat for 3 sets of 10 - 12 reps.
TIP: Your body shouldn't swing to get the barbell up with motion. It should remain stationary; the work comes in from your biceps.
Primary Muscles Targeted & Secondary Areas
Biceps are actually two muscles; they consist of the long head and the short head. The biceps run from the elbow to the shoulders. Without a muscular bicep, the effects of aging will cause a determination in the range of movement across your entire arm. The biceps are strong and in charge of controlling elbow flexion and supination of the forearm.
The secondary target of any bicep curl, barbell or dumbbell, is the forearm. Barbell curls grow your forearms and improve your grip strength.

Reps & Weights
As with everything, there are recommendations and suggestions. These are there to ensure that your training is risk and injury-free. Going too hard on your weights might not give you physical harm the first time, but it is enough to give you T-Rex arms the next day. Sore, cramped up, and definitely NOT the look you want.
Beginner
Beginners should go for:
Intermediate
Intermediate lifters can go for:
Advanced
Advanced level fitness fundis should aim for upwards of:
Listen to your body and perfect the movement before progressing onto heavier weight sets. That is how you guarantee a perfectly built bicep. You might also want to check out our one-rep max calculator to find the right load for you.
Barbell Curl Benefits
As far as the barbell curl goes, this exercise has several benefits. Exercises aren't just superficially great; it is a little deeper than that.

Tips FOR DOING THE BARBELL CURL

Adding Barbell Curls to Your Routine
How do you add these bad boys to your routine? It's simple, slot them in the right at the start of arms or chest day. Here are a few other exercises you can do alongside the curl.
Dumbbell flyes
The dumbbell fly is excellent for pecs and traps.

- 1Lying with your head and shoulders flat on a bench at a 45-degree incline, plant your feet flat on the floor.
- 2Hold a set of dumbbells, one in each hand directly above your chest; your palms should be facing each other. Begin to form an arc as you lower the weights to your sides.
- 3Engage the pectoral muscles to reverse the movement.
- 4Keep your elbows slightly bent throughout and your back flat.
Bench press
You can't just work on your biceps alone; it will distort your arms' aesthetic if your traps, pecs, and delts are not defined and built as well. Bench presses are the perfect addition to an arm day workout involving the biceps.
Here's how to bench perfectly:

- 1Lying flat on a bench, grip the bar - your hands should be slightly wider than shoulder-width apart.
- 2Slowly bring the bar down to your chest while you inhale.
- 3Begin pushing the bar up as you exhale, grip the bar hard and focus on a spot on the ceiling.
- 4Once at the top, squeeze for a full count of one.
- 5Slowly return to the starting position.
Reverse barbell curl
Reverse barbell curls are vital for growing the brachialis muscle underneath the biceps, which is often neglected.

- 1Gripping a bar with a shoulder-width grip, your hands should be pronated. Gripping the top of the bar, it is the opposite grip of the traditional curl.
- 2Keep your elbows close to your sides and a slight bend in your knee. Grip the bar tightly.
- 3Begin to curl it up as you would with a regular curl. The pronated grip will engage the brachialis muscles.
- 4You should feel the tension in your forearms as you come toward the top.
- 5Hold the curl for a second or two at the top, and begin to lower back down to the starting position.
- 6Repeat. Try not to go too hard here as the muscles will be sore the next day.
Concentration curl
Anyone that lifts and enjoys lifting will be able to tell you that the concentration curl is an excellent way to build bigger biceps. Try the close-grip concentration barbell curl - it’s great for working on isolating your biceps.

- 1To do these perfectly, sit on the edge of a seat and position your feet around 24 inches apart.
- 2Grip either a free weight or an EZ-bar with an underhand grasp and with around 6-inches of space between your hands.
- 3Twist forward at the midriff and support your elbows on your internal thighs around 4 inches from your knees.
- 4Focus on your biceps, lifting the bar until your lower arms touch your biceps.
- 5Contract your biceps completely. Begin to lower your arms down to the starting position slowly.
- 6Try to keep your body and upper-arms still while you're performing these curls.
Who does the curl?
The barbell curl is no stranger in the midst of heavy-weight legends. Here are a few famous lifters who love the curl, and they have the biceps to back it up.

Barbell Curl Variations & Alternatives
If you are looking for a few alternatives or a few variations to try out, look no further. These alternatives are bicep killers!
Incline dumbbell curls

- 1To do the include dumbbell curls, sit down on a bench set to 45-degrees. Flatten your back against the bench. Engage your abdominal muscles tight.
- 2Hold a dumbbell in each hand. Begin lifting each dumbbell toward your shoulders.
- 3Slowly lower the dumbbells back down to the starting position.
Zottman curl
Zottman curls target one of the biggest muscles in the arms: brachioradialis. Here is how to get that big muscle strong and visible.

- 1Keep your back straight & grip a set of dumbbells. Begin contracting your biceps and curl the weights up towards the shoulders. Keep your elbows tucked in and tight.
- 2Squeeze your biceps hard at the top of the curl.
- 3Begin twisting your hands so that your palms face the ground.
- 4Slowly lower the dumbbells to the starting position.
- 5Turn your palms upwards to the starting position.
EZ-bar curl
EZ-bar curls are wrist savers - some lifters might find barbell curls to be uncomfortable on the wrists. They are almost exactly like regular curls except for the bar used - the EZ-bar has a set of bends in it that enable your palms to face each other. This takes a little strain off the wrist area and helps you benefit from barbell curls without strain.

- 1In order for you to perform the EZ-bar curls, grab the outermost bends in the bar with an underhand grip. You should tilt your palms toward one another.
- 2The same rules apply to the EZ-bar curl. Curl the bar up towards the upper body.
- 3Stand up straight with your head up and keep your elbows stationary. There should be no motion in your elbows.
- 4As you lift the bar upwards toward your chest, your forearms should touch your biceps - lower the bar to the starting position and repeat.
Chin-ups

- 1To perform a chin-up, station a bench or jump box underneath the pull-up bar, step up to the top of the platform.
- 2Reach up and grip the bar with two hands in a palms-up grasp. Keep your back elongated and your spine straight, lift your chest and engage your abs to help stabilize your trunk.
- 3Begin pulling the body up to the bar. Try lifting your chest to the bar by pulling the elbows past the rib cage.
- 4At the top, pause and hold. Begin to control the descent as you release and lower your body down to the starting position.
- 5Don't just drop down - releasing gradually holds the muscles under pressure for longer, creating strength and definition.
The Bigger, The Better

Bigger, better arms are not just good to look at; they have a function and a purpose. They make your life easier doing everyday functions and picking up heavy items or moving houses.
There are few people who tell you they don't want to age well in this life. Those people are lying. Muscular and functional biceps are a lifelong advantage. Later in life and in present times, you will see the benefits and feel them instantly.
Zac Efron leg Workout
| #1 Barbell Squat | |
|---|---|
| Sets | 4 |
| Reps | 8-10 |
| Rest Time | 90 seconds |
The barbell back squat is the simplest exercise you can possibly imagine. Yet, with all of the innovation in the fitness industry and the introduction of a plethora of lower body training equipment, including all sorts of leg press and hack machines, the good old-fashioned back squat remains the king of exercises.
But it’s also the exercise that you’ll see most improperly performed and, as a result, the one that causes the most injury. But don’t worry, you’re in safe hands here - I am going to lay out the benefits of squatting, along with a quick overview of correct technique. Then I will drill down to identify and overcome the most common mistakes that people make while squatting. I'll also provide you with some awesome auxiliary squatting exercises, lay out three squatting no-nos and give you the low-down on squatting shoes. It all adds up to the most comprehensive squatting guide you'll read this year!
How to Perform the Barbell Squat
- 1Position an Olympic bar on a squat rack at the level of your shoulders. Load it up and put on the collars.
- 2Position yourself under the bar, with it resting across your mid traps (this is the default position; see the bar positioning section below for more detail on bar positioning for strength vs mass gains).
- 3Unrack the bar and take a step back.
- 4Position your feet shoulder width apart, toes slight outward.
- 5In the start position, your spine should be neutral, your knees slightly bent with the hips back and you should be looking directly ahead.
- 6Squat down until your quads are parallel to the floor.
- 7Push through the heels to explode back up, keeping the hips back and being sure to keep your knees just short of lockout.
- 8Continue in a smooth, piston-like manner to complete your set.
Barbell Squat: Muscles Worked
The barbell squat directly targets the four muscles that make up your quadriceps. They also work the gluteus maximus (butt muscles), hamstrings, hip flexors and core. Yet, this is an exercise where the sum of the parts is greater than the individual benefits. You see, when you squat heavy and hard, you put your body into an anabolic state. All weight training exercises will do this, but the barbell squat does it more than any other. In the 24 hours after an intense squat workout your testosterone and human growth hormone levels will be enhanced.
6 Hacks for Better Barbell Squats
Barbell Squat Hack #1: Bar Positioning

The position of the bar on your back makes a big difference to the effect of your squat. If you are focused more on lifting heavy weight than on developing leg size, then you should follow the powerlifting pattern and position the bar as low as possible across your lower traps.
Doing so will position your glutes and erector spinae in the ideal power position.
However, if you are focused on building size in the thighs, then you want to place the bar high on your shoulders, across the upper traps.
Bar positioning is also important when it comes to working with injury. The higher you position the bar when you squat, the harder it is on your knees. That’s because it forces you to stay more upright, making the knees take the brunt of the load as you descend into the squat.
A low bar position, however, forces you to lean forward slightly in order to keep the bar over your center of gravity. That allows you to load up the hips and back more than the knees. That’s why you should position the bar quite low, along the posterior delts when you squat. If you’re a person with back problems then you should do the reverse, positioning the bar as high as you can on the shoulders.
Barbell Squat Hack #2: Foot Positioning

If you’re a person who regularly squats, you know how important your feet are to your success. The entire force that you are exerting is coming through your feet. If you don’t have them encased in a shoe that will provide rigidity, correct angle, alignment and adequate support, you’re going to be in trouble. Not only will your lifts be disappointing, but you are likely to do yourself some long term injury.
Perform the barbell squat with your feet at least shoulder width apart, your toes pointing slightly outward. Do not stand with your heels on a block or turn your toes widely outward. Doing so will place undue stress on the knees, opening you up for long-term injury. Rather, make sure that you are wearing a quality pair of weightlifting shoes that feature a three quarter inch raised heel (more on this later).
Barbell Squat Hack #3: Upright Torso
In order to place maximum pressure on your quads, you will need to keep your torso as upright as possible through the entire movement. However, you will want to maintain a slight forward bend. Thrust your chest out and look straight ahead as you perform both phases of the move.
Barbell Squat Hack #4: Coming out of the Hole

Getting out of the bottom position (the hole) of the barbell squat is where most people tend to have a form break down. They will either lurch forward with the chest or push the hips backward to initiate the ascent. The key to doing the move most effectively, and therefore putting the maximum amount of stimulus on the quads, is to move the hips and the chest at the same time. Maintain a tight, stable core throughout the movement.
Moving the hips and chest together as one unit is the key to keeping the pressure off the lower back and on the thighs, where it belongs.
Barbell Squat Hack #5: Good Mornings

If your goal is to get bigger legs, you’ve got to squat heavy. And to do that you have to do more than just set after set of the barbell squat. True strength comes from building up your compensatory strength and that happens by developing the stabilizer muscles that go into the squat movement.
The good morning is a great auxiliary move that will build up your squatting power.
When done properly, this is an excellent move to teach the hip hinge, which is crucial for proper squat and deadlift movement. You don’t want the weight to be too heavy on this exercise. Do 3 sets of 10 reps.
Here’s how to perform the Good Morning exercise:
- 1Place the barbell in a squat rack a little lower than shoulder height. Now approach the bar with a split stance and unrack the bar onto your upper back. Step back with feet shoulder width apart and feet tight.
- 2Hinge forward from the waist while keeping your back straight. Allow your glutes to stick out behind you but keep your legs straight. Come down until your upper body is parallel with the floor and then reverse the movement. Keep your knees slightly bent in the top position. Keep your abs tight and your spine neutral. Squeeze the glutes on the way back up.
Barbell Squat Hack #6: Banded Goblet Squats

There are a number of squat variations that you should add into your overall training plan, such as the front squat. Another of the very effective squat variations is the banded goblet squat. One benefit of the goblet squat is that it teaches you to squat to depth. Holding a dumbbell in front of you is not as intimidating as having weight on your back, so you are inclined to squat lower.
If you can’t get out of the hole, you can simply dump the weight to the floor. This will transfer to confidence when you are squatting with the bar.
The goblet squat also has the weight sitting perfectly over your center of mass. This helps you to squat up and down properly. Adding the extra element of a band with help to train your body to keep your quads out rather than the knees beginning to cave as you come out of the hole.
Perform the banded goblet squat this way:
- 1Connect a resistance band to a low anchor and then stand about 18 inches away from the anchor point with a dumbbell nearby. Place the band around your outer thigh and move away until the band is taut. Now grab the dumbbell and hold it by one end in front of your chest.
- 2Squat down, keeping your back straight, to bring your elbows to the inner thigh and then smoothly push into the ground to come back to the start position.
- 3As you get stronger with this exercise, step further away from the anchor point. Perform 3 sets of 10 reps.
What Not to Do When Squatting
Don't Bounce
If you go to the end of your range of motion during an open joint movement, such as dropping all the way down when doing barbell squats, you put your knee ligaments on a stretch. In and of itself, this is not bad. But any additional stress on those ligaments - like bouncing at the bottom of the squat to get back up - can stretch those ligaments out, rendering your knee permanently unstable. That’s the basis for the recommendation not to bounce at the bottom of the squat. It’s the same reason that some exercises that were popular in the 70’s, like the duck walk, are now on the no-go list.

Don't Angle the Lower Leg
When squatting, keep your lower legs as close to vertical as you possibly can. Keeping your shin bones vertical drastically reduces your risk of injury (when you perform the movement, it may help to concentrate on keeping your feet flat on the floor).
Don't Use a Box
Do not barbell squat over a box or a bench. Every time you touch the bench or box, your spine compresses slightly. This will eventually cause vertebral damage.
Should I Wear Squatting Shoes?
The science of squatting has made it clear that a raised heel puts the body in the ideal plane for the perfect barbell squat. It keeps your torso in the correct alignment and it allows you to exert maximum force through the ankles and heels. In the past, this correct alignment was achieved with the aid of a block of wood. However, a block is not the best idea as it places undue stress on the knees.
Fortunately, over the last decade, a market has developed to cater for the need to wear a specially designed Olympic weightlifting shoe. As with any industry, however, the quality on offer ranges from shockingly bad to out of the ballpark good. Unless you know what to look for in a dedicated Olympic weightlifting shoe, you are going to find yourself at the mercy of the sharks out there. Here, then, are the key requirements of a good Olympic weightlifting shoe:
Raised Heel
A three quarter inch wedge in the heel of the shoe will allow you to position your ankles correctly for the descent of the squat. In times past, bodybuilders used to place a two-inch block of wood under their heels when squatting. They instinctively knew that a raised heel would give them the best body positioning. Today, science has proven this to be the case.
Rigidity
In contrast to the majority of athletic training shoes, Olympic weightlifting shoes are very rigid. This ensures that they provide maximum lateral and medial integrity. As a result, the shoe is generally made from a hard material that will not bend to the touch. Often though, the toe box area of the shoe is noticeably softer, providing added comfort in the toe area.
No cushioning
Weightlifting shoes feature a lot less comfort padding than conventional athletic shoes. This helps to keep the foot secure, preventing lateral movement within the shoe while executing such lifts as the squat.
Secure locking mechanism
To further ensure that there is no side-to-side movement of the foot when performing an exercise, a dedicated Olympic lifting shoe will have a very secure foot locking system. Often this will be by way of both a Velcro single or double strap and a secure lacing system.
Grip
The connection to the floor is essential when performing overhead weight exercises. A good weightlifting shoe will feature a very firm grip that will provide absolutely no lateral movement. Many shoes feature a cupping system that provides suction like capabilities to ensure the integrity of the connection between the foot and the floor.
Wrap Up
The barbell squat isn't known as the king of gym exercises for nothing. The back squat will help get you bigger and stronger than any other single exercise that you can do. But the barbell squat can also be one of the most troublesome moves you can perform on the gym floor.

The human body was not designed to be compressed under a weight of several hundred pounds. If you are aligned incorrectly or otherwise use bad squat form, your body, especially the knees and hips, are going to pay the price. In this article, you have discovered everything you need to know to get the maximum muscle building benefit from the barbell squat while avoiding the pitfalls.
So now that you know what to do, go out and squat.
| #2 Jumping Lunges | |
|---|---|
| Sets | 4 |
| Reps | 8-10 |
| Rest Time | 90 seconds |
If you are looking for a more dynamic movement that will make you feel athletic, this is it. The jumping lunge primarily targets the quadriceps, but will also activate the hamstrings, glutes, calves and lower back.
execution
- 1Stand up straight and take a step forward - This is your starting position
- 2Go down, without hitting your knee
- 3As you come up, jump and switch your legs
- 4Repeat and alternate between sides - Right leg in front, left leg in front, etc.
| #3 Leg Press | |
|---|---|
| Sets | 4 |
| Reps | 8-10 |
| Rest Time | 90 seconds |
As a replacement to the squat or simply to complement that major compound exercise, the leg press is a fantastic move to bring into your arsenal.
This one of the top 10 leg exercises will hit your quads, hamstrings, and glutes and will allow for excellent power generation.
execution
- 1Sit down on the leg press and lie back
- 2Rest your head and back
- 3Press the butt into the seat pad and the back into the back pad
- 4Grab the handles and place the feet on the platform at shoulder width
- 5Un-rack the platform and take the initial position, where your legs are slightly bent at the knees
- 6Let the platform go down slowly, maintaining tension on the legs
- 7Once the legs are at a 90-degree angle, push the platform to the initial position
When doing the leg press, be sure to keep the back pressed flat into the back pad at all times (never let the low back round as you drive the weight up) and go as low down as you can go.
Drop sets are especially effective on this exercise, so try stripping one plate off the machine after each set.
Do a few of 10-15 on these with little rest in between and you'll really feel it burning.
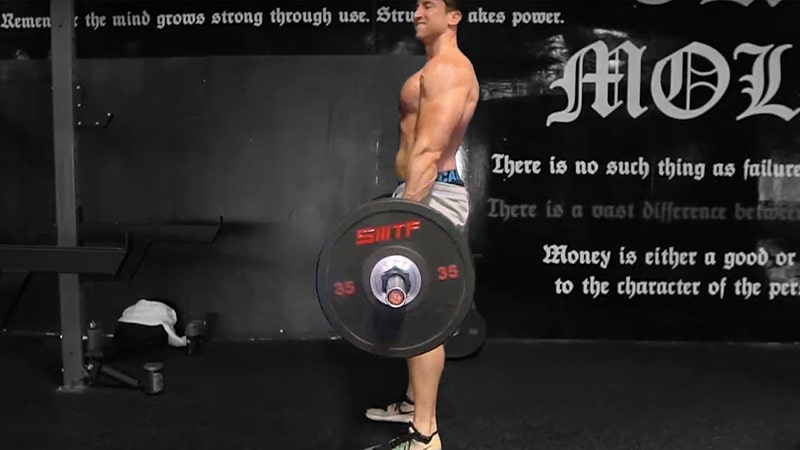
| #4 Stiff Leg Deadlift | |
|---|---|
| Sets | 4 |
| Reps | 8-10 |
| Rest Time | 90 seconds |
As great as squats are for your workout routine, no lower body session would be complete without some sort of deadlift added into the mix and the stiff lead deadlift is a great variation to target the hamstrings and glutes. The hamstrings and gluteus muscle are 2 of the largest muscles in your entire body, and sadly many lifters overlook this exercise.
Squats put a lot of emphasis on the quad muscles, while deadlifts hit the posterior chain to a larger degree. By doing a stiff leg deadlift you are able to target the hamstrings and glutes more effectively.
Having both in your program ensures you are building a well-rounded body and aren't going to be at risk for any muscular weaknesses.
The stiff leg deadlift performed with dumbbells is a great hamstring exercise that builds bigger, stronger and less injury prone hamstrings.
The key with this exercise is in the execution, so be sure to watch the video carefully and follow the execution steps laid out below. I recommend that this hamstring exercise become a staple in your workout routine. You should be training your hamstrings just as often as you train your quads to prevent any muscular imbalances.
Try adding in 5-10 sets per week of the dumbbell stiff leg deadlift. This exercise is featured throughout the SuperHuman Muscle 12 week program as well because of how effective of a mass building movement it is.
execution
- 1Grab a pair of dumbbells
- 2Step with your feet closer than shoulder width
- 3Keep the dumbbells by your sides
- 4Maintain a straight torso and slightly bent knees
- 5Bend over slowly, stretching the hamstrings
- 6Go back up, driving the movement through the hips
- 7Contract the glutes up top and repeat
A dumbbell stiff leg deadlift is great for helping to work the hamstrings, glutes, and lower back and can be done quickly and easily as there's no barbell to set up.
To really reap maximum gains from this move, you want to lower the weight down in a slow and controlled manner until you feel a good stretch on the hamstrings.
Watch as you do this move that you aren’t rounding your back out.
If anything, it should remain relatively flat or even arched as you execute the movement.
Do 8-10 reps per set, focusing on taking the weight heavier on this exercise.
In order to get shredded you need to dial in the nutrition, so let’s take a peek at the Zac Efron Baywatch diet plan now!
Zac Efron’s Diet Program
Zac Efron followed a low carbohydrate diet plan for 6 days of the week when preparing for his role in Baywatch, and then had 1 cheat day where he usually slammed down a really high carbohydrate dinner!The reason for this is that your metabolism slows down a bunch when you diet, and by having 1 day where you consume a larger amount of carbohydrates and calories you are able to reset your metabolism and actually burn more fat than by not having a cheat day. Yes – you can have your cake and get ripped too and that is exactly the motto of the Crave Diet which is the diet plan on all the SuperHuman training programs!Let’s take a look at his low carbohydrate diet plan, and check out what he would do for dessert on his cheat days.
MEAL 1
- 4 scrambled eggs
- 6 ounces chicken
- Veggies, avocado
MEAL 2
- 6 Ounces grilled turkey breast
- 1 cup steamed veggies with 1 tbsp. olive oil
- 1 large glass of green tea
MEAL 3
- 6 Ounce sirloin steak
- Grilled cauliflower with coconut oil
MEAL 4
- 8 Ounces wild caught salmon filet
- Large spinach salad with olive oil based vinaigrette
MEAL 5
- 5 Ounces grass fed beef
- 3 hard boiled eggs
On the 7th day of the week Zac would incorporate about 200 grams of carbohydrates, most of which came from a killer cheat meal dinner that he actually tweeted about – take a look for yourself!

When you diet for 6 out of 7 days you can have one epic cheat meal like this and still look super ripped!


